Showing posts with label nature. Show all posts

Wednesday, September 24, 2014

Salsa Verde

So I made salsa, and I didn't take pictures. *GASP* I know, it's tough to believe. Time was kind of a factor though. About a week ago, we had a sudden cold snap that resulted in a hard frost that prematurely killed my garden. Excuse me while I take a minute to go sob in a corner... See, what you have to understand was that I was extremely proud of my garden, because it's the first real one I've had - I'm talking plants in the ground and a fence and everything. Did I mention I started it all from seed? If you know me at all, you know I don't have much luck with seed starting, and that usually results in a trip to the garden center to buy transplants. And when a freak hail storm in early spring destroyed my newly transplanted seedlings, I raised replacement plants from seed all over again. I was amazed at the success I had this growing season. Anyway, the god-awful frost froze my plants solid, and so I was left with a bunch of green tomatoes and half-ripe tomatillos on dead vines. Fortunately, I could spare the fruit, but I knew they wouldn't last long unless they were processed immediately. A quick internet search brought me to a recipe for salsa verde made from green tomatoes. I figured I could use this same recipe for both my tomatillos and my green tomatoes, and turns out I was right. It rendered a delicious batch of salsa verde that I will proudly serve at my upcoming Day of the Dead-themed pumpkin carving party (more on that in a later post).

So here's the recipe, copied from Ball's Fresh Preserving Website (link above):

YOU WILL NEED:

  • 7 cups chopped cored peeled green tomatoes (about 12 medium)
  • 5 to 10 jalapeno, Habañero or Scotch bonnet peppers, seeded and finely chopped
  • 2 cups chopped red onion (about 2 large)
  • 2 cloves garlic, finely chopped
  • 1/2 cup lime juice
  • 1/2 cup loosely packed finely chopped cilantro
  • 2 tsp ground cumin
  • 1 tsp dried oregano
  • 1 tsp salt
  • 1 tsp freshly ground black pepper
  • Ball® (8 oz) half pint glass preserving jars with lids and bands 

DIRECTIONS:

  1. PREPARE boiling water canner. Heat jars in simmering water until ready for use. Do not boil.  Wash lids in warm soapy water and set bands aside.
  2. COMBINE tomatoes, peppers, onion, garlic and lime juice in a large saucepan. Bring to a boil. Stir in cilantro, cumin, oregano, salt and pepper. Reduce heat and simmer 5 minutes.
  3. LADLE hot salsa into hot jars leaving 1/2 inch headspace. Remove air bubbles. Wipe rim. Center hot lid on jar. Apply band and adjust until fit is fingertip tight.
  4. PROCESS filled jars in a boiling water canner for 20 minutes, adjusting for altitude. Remove jars and cool. Check lids for seal after 24 hours. Lid should not flex up and down when center is pressed.
    Quick Tip: Use from 5 to 10 hot peppers to reach the level of heat you desire. When cutting or seeding hot peppers, wear rubber gloves to prevent hands from being burned. 

    A little info about my process: I didn't seed my jalapenos. I like medium to hottish salsa, and jalapenos for the most part don't contain that much kick to me. If you like a mild salsa, you absolutely MUST seed your peppers. You could also try using bell peppers in place of hot peppers to help turn down the heat. Also, I tried the little trick where you blanch the tomatoes first and then dunk them in ice water to help with the peeling process. I don't know if it was because the tomatoes were green, but it didn't really work as well as it does with ripe tomatoes. Just be aware that you may have to pull out our vegetable peeler for this one.

    I also made a batch of red salsa, but I had to supplement with canned, diced tomatoes from the supermarket because I didn't have enough homegrown, ripe tomatoes. I used the same recipe I blogged about a couple of years ago. That blog has pictures, for all you visual types! Later, taters!

    Tuesday, April 29, 2014

    Spring in Full Swing

    We've had a nice warm streak here in Big Sky Country, so it's finally springtime for sure. Here are a few projects the little one and I have been working on:
    That's a springy wreath my little one wanted to make for her room. We got the idea from Pinterest, naturally. See the tutorial here. We also made another wreath for the front door. No tutorial for this one, but it's similar to all those other yarn wreaths out there:

    I've also done some new pictures in oil paints. The first one turned out nicely, even though it didn't end up looking like the inspiration picture at all. The second painting is one for my dad, which I will give him for Father's Day. It's of the battlefield at Antietam National Park in Maryland. It looks much more like its inspiration photo.

    Yeah, the stone fence didn't work out at all. Happy accident!


    For Easter, the little one and I made bunnies. They were simple, inexpensive, and quick. Tutorial here.

    And last but not least is the veggie garden in process:
    They're just about ready for the garden!

    So that's it. Sorry for the long post, but it's been a while, and I wanted to show you what I've been up to. Have a great week, guys, and see you back here next time!

    Monday, February 24, 2014

    Westward, Ho!

    So, I know I haven't talked much about it, but I thought I might share some photos from our journey westward to Big Sky Country. I didn't get a lot of photos because I was driving, but I got enough to sum up our journey.

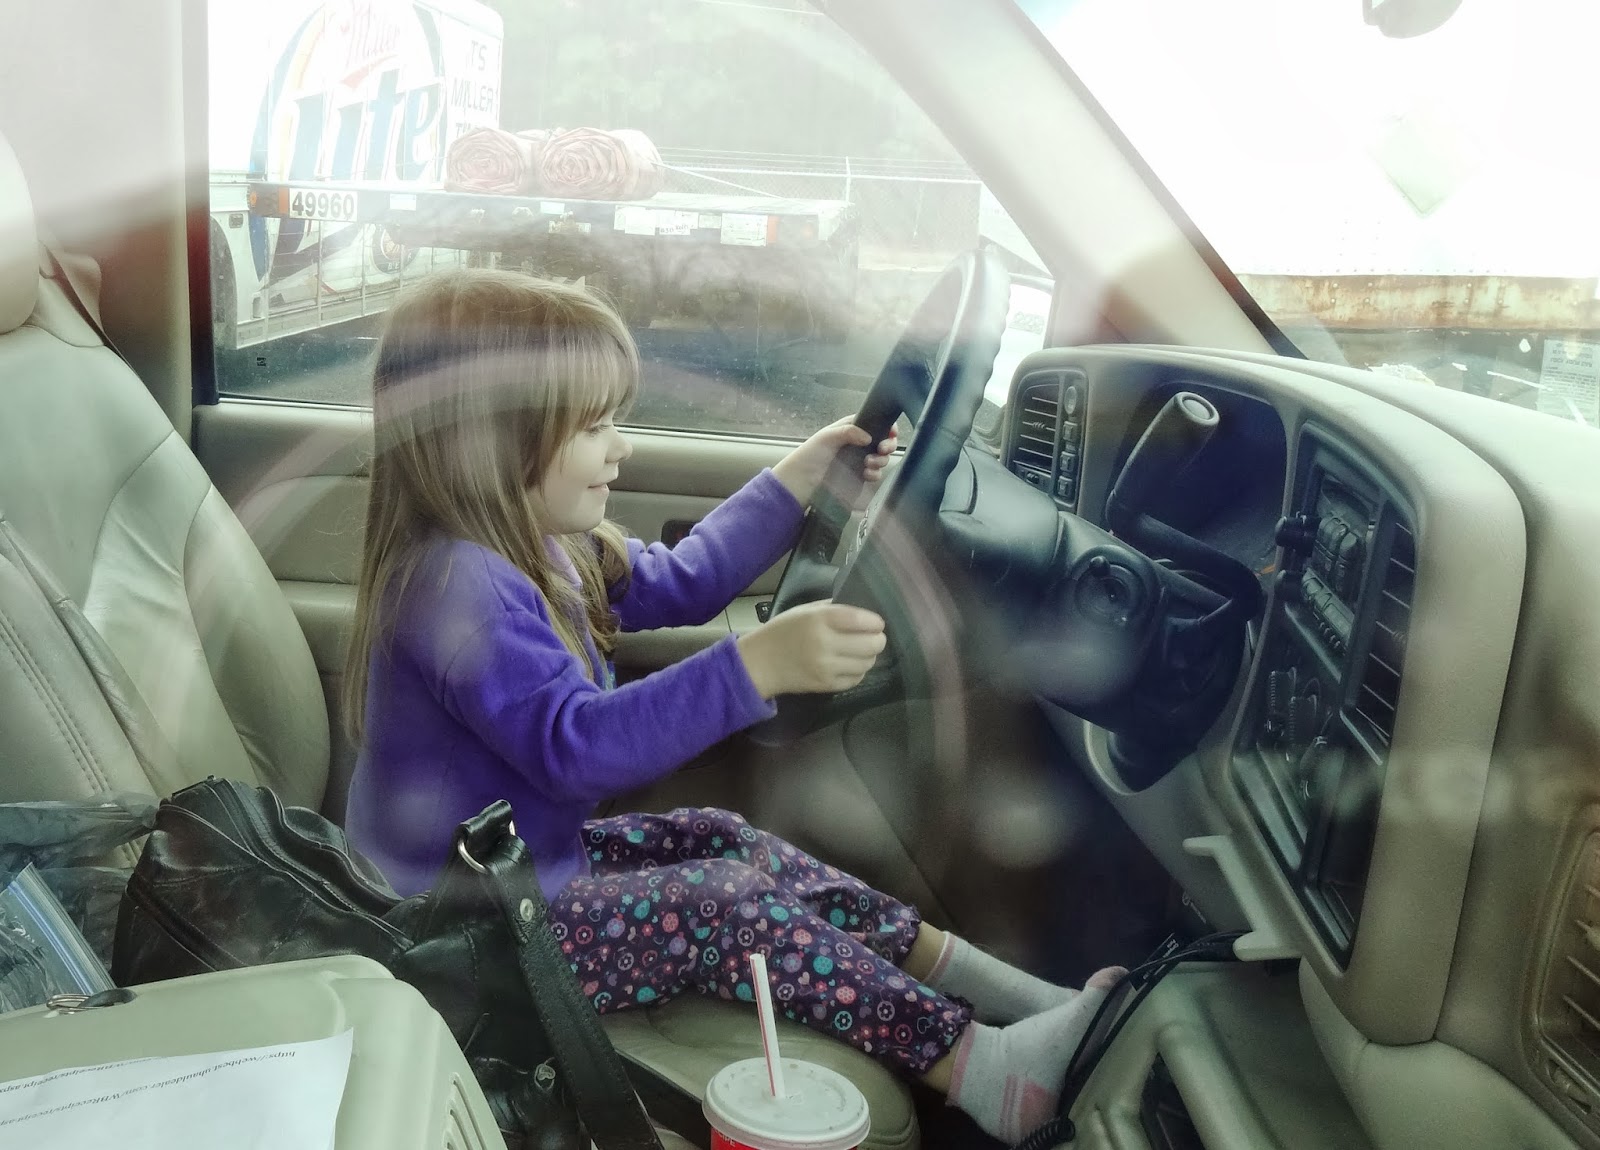
    This is my little one pretending to drive while we were stuck at the auto repair place in Augusta, GA. Word to the wise, rent something other than a U-haul. I won't go into detail, but suffice to say, after about 12 hours on day one, we'd only covered a distance that usually takes just two hours. Not a good way to start the trip. Fortunately, there weren't anymore problems once we got back on the road, but by then, I was already pretty frazzled.

    Day two began with us in Monteagle, TN. We woke up to LOTS of fog - like all the cliches about pea soup and hands in front of your face were completely true. While we waited for visibility to improve, we had a leisurely breakfast at the Rocky Top Restaurant. If you ever find yourself in Monteagle, you owe it to yourself to stop here. There's very good country cooking, friendly staff, and reasonable prices.


    More pics from day two: the Nashville skyline, farm life in Kentucky, my tuckered out crew (traveling with a five year-old, a dog, and a cat isn't easy), and the St. Louis arch. We covered as much ground as we possibly could on day two in an attempt to make up for lost time on day one. It was pretty hard, but I really wanted to get to Montana as close to on-schedule as possible. My husband had been in Billings for the last two months, and we'd missed our 10-year wedding anniversary, Halloween, my husband's birthday, Thanksgiving ,and our daughter's 5th birthday together. When my mother in-law offered to help me move out so we didn't miss Christmas together too, I was grateful, and I didn't want to wait any longer than I had to in order to finish the journey.

     When the St. Louis arch came into view, I was a happy camper. I'd been excited to see it since I found out we'd be passing by it on our trip. However, today, the "gateway to the west's" beauty signified something else: our day of driving was nearly done, and better yet, we were halfway to Montana. Twelve hours and four states later, we stopped on the west side of St. Louis and rewarded our monumental driving efforts with dinner at Steak' n Shake.

    Day three had us driving through a whole lotta nothin'. To the right is a pic of my little one at a rest stop in Iowa, getting a preview of the snow we had to look forward to. We had to trek the rest of the way across Missouri, into Iowa, and then across the vasty nothingness of South Dakota. To illustrate how little there is in South Dakota, my mom-in-law's husband, in spite of our warnings, decided to forego stopping for gas in Sioux Falls. When we began looking for gas, we finally found a little place several miles off the interstate. This town was so small, the gas station was also the town's grocery store and pizza joint!


    On day four, the final day of our journey, we started out about two hours from Rapid City, SD. Over to the right you can see that vasty nothingness I was talking about. Once we got to Rapid City, we took a detour to go see Mt. Rushmore, because coming so close and not seeing it seemed like a crime. After that, we had lunch in Sturgis, SD, where my mom-in-law picked up some souvenir t-shirts at the Harley Davidson shop for her nephew and his wife, who are avid bikers. From there, we made the final push across Wyoming, and I tell you, it was beautiful. The snow on the landscape looked like someone had dusted powdered sugar over a giant donut. There were mountains, antelope, bald eagles, and more deer that I've ever seen in my life! We even got to see Devil's Tower, which is fantastic, because it is literally the only thing around for miles. I'm telling you, if you ever have the opportunity to drive across Wyoming, DO IT! Just fill up on gas first, because if you don't, you might find yourself surveying the landscape on foot with a gas can in one hand.
     This picture doesn't do them justice, but here are some of the Bighorn Mountains (I think). And to think this scenery is practically in my backyard! Anyway, after stopping in Sheridan, WY, we got back on the road and finally arrived in Billings at about 8PM. WHEW! Even though I was sleeping on an air mattress because our stuff was still in the truck, I've never slept so hard in my life.

    So there you have it. Our four-day driving marathon across the ol' U.S. of A.

    Saturday, December 7, 2013

    Saying Goodbye - a Picture Blog

    Now that we're moving across the country, I thought it would be nice to look back on the house we lived in during our last year in NC:

    The neighbor's ducks
    Our mutt chillin' on the front porch
    Hummingbird at my feeder
    Deer in the field behind our house
    My flowers
    More flowers
    A rainbow over the cornfield next to our house
    Fairy ring in the back yard

    Goodbye, house!

    Saturday, November 23, 2013

    A Tribute to Northville in Pictures

    Now that the sale of our NY home has concluded, I thought it appropriate to pay homage to the little town that taught me to love snow, New England autumns, and Stewart's ice cream. This was the place where my daughter was born, and my beloved German Shepherd died. I realized a little too late how great a place this was, but I'm glad I got to experience Northville even for a little while.

    Our happy home
    Great Lake Sacandaga
    Fall beauty in town
    White Christmases
    Snow dogs
    Backyard fall fun

    Tuesday, May 7, 2013

    Sleepy Posting

    I'm drowsy blogging today, folks. I stayed up a whee bit too late while gaming last night, then got up a whee bit too early to take my little one to preschool. Bare with me.

    A little while back I mentioned sprucing up my front porch, and today, I'm sharing the pics with you. This is what my porch looked like before:

    Cute, but not a lot going on. There was only seating for two, and that seating kept blowing over in the wind. Behold, the after:


    There's now comfortable seating for at least four, maybe more if people don't mind getting friendly.  Best of all, I now have more storage space, because all of the benches open up. The folding Adirondack chairs have been relocated to the fire pit so we can have a place to sit on bonfire nights. Magically, they've stopped falling over; I guess they didn't really want to be on the porch. I stole some ideas from Pinterest - namely, spray-painting over my old green pillows to match my new blue color scheme, and that little plant stand made from a tomato cage. I also made my own version of that adorable pillow from Etsy using burlap, acrylic paint, and plastic grocery bags as stuffing. See a closeup here:

    Now my porch is all ready for lovely spring and summer days. That is, after I wash the pollen off everything!


    Friday, March 15, 2013

    Potatoes and Tusks

    Fierce!
    This week is the week of deliveries. Yesterday, I got my troll tusks from the wonderful people at Medieval Collectibles. I'm getting pretty excited about my costume now. Aside from the makeup, I now have all the elements of the costume that I myself am not going to make. I'm also expecting my friendly neighborhood UPS guy to bring my patio storage bench that I ordered from Amazon. Hooray for more storage space!

    This week we've been blessed with beautiful weather. I have to tell you, after the crazy winter we've had, I'm thankful for some calm spring-like days. All this has got me looking outside in anticipation of gardening. A few days ago, my little one and I started some tomatoes, tomatillos, sweet and hot peppers, and zucchini seeds indoors. I was curious how this would go because the tomato seeds were some I saved myself a couple of growing seasons ago, and the peppers and zucchini are close to 3 years old. I honestly didn't expect any of them to sprout, but sure enough, the tomatoes and zucchini are.

    Yesterday, we headed outside to plant some Dutch iris bulbs in a little, neglected garden bed under our tree. I found that daffodils and grape hyacinth were previously planted there, so that was a pleasant surprise. The grape hyacinth seems to be making a run for it though, because I see blooms popping up in the grass up to ten feet away from the bed. I weeded, put down ant killer and fixed the rock ring around the bed. We also planted some zinnia seeds in my umbrella stand planter and began a potato tower. I have a lot of plans in store for my yard, and a lot of work ahead of me to get it done, but I'll be glad to be outside. Who knows, maybe I'll even get a tan this year.


    Wednesday, May 16, 2012

    Gardening Picture Blog

    It's picture blog time! It's May, and here in NC, that means gardening season is in full swing.

    My corn is knee-high. Every time we go check on it, my little one asks if it has ears yet. She has a hard time believing that will be even taller than mommy in just a few weeks, so I can't wait to see the look on her face when it is.

    I had some volunteer pumpkins this year. Apparently my compost didn't finish cooking enough to kill the seeds of our jack-o-lantern from the previous Halloween, so when I moved the compost, I got a few sprouts. I honestly didn't expect them to make it, so I didn't put much effort into helping them grow. In spite of my neglect, the sprouts survived, so I recently put a small fence around them so that my landlord wouldn't run over them with the lawn mower. I now I have an impromptu pumpkin patch, and I hope not to have to buy pumpkins for jack-o-lanterns this year.

    I keep getting a handful of peas at a time. I will definitely have to plant more peas next time, because these are SO delicious, but there isn't enough of them to share.


    I finally gave up on my bare root strawberries sprouting, and so I purchased potted strawberries instead. This is so much nicer than looking at an empty pot.

    Here's a ladybug hanging out on our carrots. These are Danvers heirloom carrots, and the roots are just starting to turn orange. I can't wait to have fresh carrots with my salad!

    My tomatoes are now taller than this, and they're starting to bloom. The 2-liter bottle is my totally advanced watering system. It has holes poked in the bottom so that it can gradually deliver water to the plant's roots. Soon, I'll need to make cages for them. Homemade salsa, here I come!

    This is my first time growing potatoes, but they seem to be doing well. We'll see whether or not they actually produce, because all I did was plant some grocery store potatoes. A lot of books I've read say that store-bought plants won't produce because they're not seed potatoes and have been treated with something to prevent them from sprouting, but these potatoes grew eyes and leaves within a week of me bringing them home. I thought it was worth a shot, so we'll see how it goes.


    I planted some more lantana in my little one's butterfly garden because I just can't get enough of the the stuff. I just love the blending of colors in the blooms.

    Be sure to stay tuned for my craft picture blog - coming soon!


    Wednesday, August 31, 2011

    World's Tiniest Tomato?


    After Hurricane Irene blew over our house on Saturday, I ventured out to see how my tomato plants had weathered the storm. I wasn't overly concerned, because I'd tethered the containers to the porch, plus they've all but finished producing; I was merely curious about the damage the storm had wrought. This little guy caught my attention - a ripe tomato about the size of a blueberry was just sitting there among the twisted and beaten vines. Have you ever seen something like this? What causes midget tomatoes? I mean, my Marglobe bush only produced cherry tomatoes this year, but this isn't even close to that size. Another little wonder of nature, I guess.

    Friday, August 12, 2011

    Making Salsa

    My tomatoes have been coming in for about two weeks now, and I decided it was high time I tried my hand at homemade salsa. I used the recipe that came with my Ball Discovery Kit, which I will post here. (I halved the recipe because I didn't have enough  bell peppers or onions to do a whole batch. It's also probably important to mention that I didn't really measure anything all that precisely.)


    Ingredients:
    5 cups tomatoes, peeled and chopped
    2 1/2 cups green bell peppers (mine were yellow and orange, actually)
    2 1/2 cups onion
    1 1/4 cups chili peppers (I used jalapenos, but any hot variety that suits your taste will work)
    2/3 cup cider vinegar
    1 clove garlic (although I halved the recipe, I still used a whole clove of garlic - yummy!)
    1 tbs. fresh cilantro
    1 1/2 tsp. salt
    1/2 tsp hot pepper sauce, optional (didn't use it - hate the stuff!)

    Directions: Prepare stockpot/canner and jars. Combine all ingredients in a large saucepan. Bring to a boil over medium-high heat, stirring constantly. Reduce heat and boil gently, stirring frequently, until slightly thickened, about 10 minutes. Ladle hot salsa into jars, leaving 1/2 inch headspace. Remove air bubbles, add more salsa if needed. Wipe rim and center lid on the jar. Screw band until fingertip-tight. Process filled jars in boiling water for 20 minutes. Remove stockpot lid. Wait 5 minutes, then remove jars, cool, and store.

    I'll make a few important side notes about my process. I used Marglobe tomatoes, which (for me at least) are small. Peeling and seeding them was no picnic. The couple of beefsteak tomatoes I used were much easier, because one alone made almost a cup of diced tomatoes. Also, I don't know if there's a trick to this, but I just grabbed the skin of the raw tomato and pulled it off. Not that it was difficult, but I'm sure there's got to be a less tedious way to peel tomatoes. Maybe some more experienced cooks out there can tell me a way.

    Another reason it took me so long to prepare my tomatoes was because I removed just about every seed possible. I'm saving my seeds to grow new plants next season. This is my first time doing this, and I hope it works. I'll let you know how it goes. IMPORTANT: If you are going to save seeds, remember to only use heirloom or open-pollinated plant varieties. This guarantees that you will have the same plant quality from year to year. Also, it is actually ILLEGAL to save seeds from patented plant varieties, and some corporations go for the throat if they catch you saving their seeds. Best to be safe than sorry! Besides, saving heirlooms/open-pollinated seeds ensures plant diversity, and makes sure that some great plant varieties aren't lost to the generations to come.

    Anyway, I followed the directions and cooked up my salsa. Half the recipe made enough for one and a half pints (plus a scoop or two for taste-testing). I did not actually water-bath can my salsa, because my intent was for it to go straight into the fridge for eating. So all I did was put on my lid, screw down the ring, and turn the jar of hot salsa over to heat up the seal on the lid and get it to stick (a little trick my mom-in-law showed me). Let it be known right now though, if you want your salsa to be shelf stable, you absolutely must process your salsa in a boiling water bath like the instructions say! Don't go get botulism and then blame me!

    And there's the finished product below. Isn't it beautiful? I know you'll have to take my word on this, but it's tasty too! It's a might hot, but what good salsa isn't?