So you know how last week I said I wanted a whole house full of those skulls I painted? TA-DA!
I picked up three more skulls from Dollar Tree and had a ball. The purple one is probably my favorite. I really like these. Think I should do more?
Showing posts with label cool stuff. Show all posts
Monday, October 6, 2014
Monday, September 29, 2014
Dia de los Muertos Skull
So I'm having a pumpkin carving party next month, and the theme is Day of the Dead. I've been scouring my favorite websites and local stores to find clever party supplies and decor. I thought I'd hit the jackpot when I found these online:
They are a set of Jewel Eye Skulls from the Los Muertos collection at World Market. Adorable, right? Well, I visited my local World Market to get a better look at these babies, and was disappointed to find that they're made of foam. From the looks of the picture I was expecting solid plastic, maybe ceramic if I was lucky, but nope, foam. Well, I wasn't about to pay $20 for something that would blow away if I turned my ceiling fan on too high.
Luckily, my local Dollar Tree had these:
These are 6-inch, hollow plastic skulls. The one I bought had a little better paint job, but it was still your basic cheap, not scary. blow-molded plastic skull. But it was only a dollar, and I had a plan. You know me. I always think, "Why should I buy something when I can make it for less?"
My next step was to purchase a 40-pack of 18mm acrylic jewels from Walmart for $2.50. I had all the paint I needed at home, including black and antique white acrylic paints, as well as a can of Rustoleum black primer for plastics and some Rustoleum spray-on clear enamel. I gave my Dollar Tree skull a good coat of primer:
Then I went to work on the details with a fine-tipped brush and my acrylic paint. Once that was dry, I sprayed on my enamel coat to make it shiny. Finally, using a hot glue gun, I added two purple rhinestones. Voila!
Isn't it wonderful? I didn't use quiet the same design as the World Market version, but I think I like this one better. I'm definitely going to make at least one more for my party. I love this one so much I kind of want a whole house full of them, and not just during Halloween, either!
Well, that's all for now. Happy crafting, folks!
Monday, March 3, 2014
Tumblr
Guess what? I now have a tumblr blog! I'm going to be really cliche with it, posting pics and quotes that make me look worldly and witty, or at least that's the plan for now. Mainly it's going to be stuff that's positive and happy that I enjoy, which is why my description for it is, "My happy place on the web." So if you like cute animals, scenic photos, and clever quotes, be sure to check it out here: amccrescentmoon.tumblr.com
Monday, February 24, 2014
Westward, Ho!
So, I know I haven't talked much about it, but I thought I might share some photos from our journey westward to Big Sky Country. I didn't get a lot of photos because I was driving, but I got enough to sum up our journey.
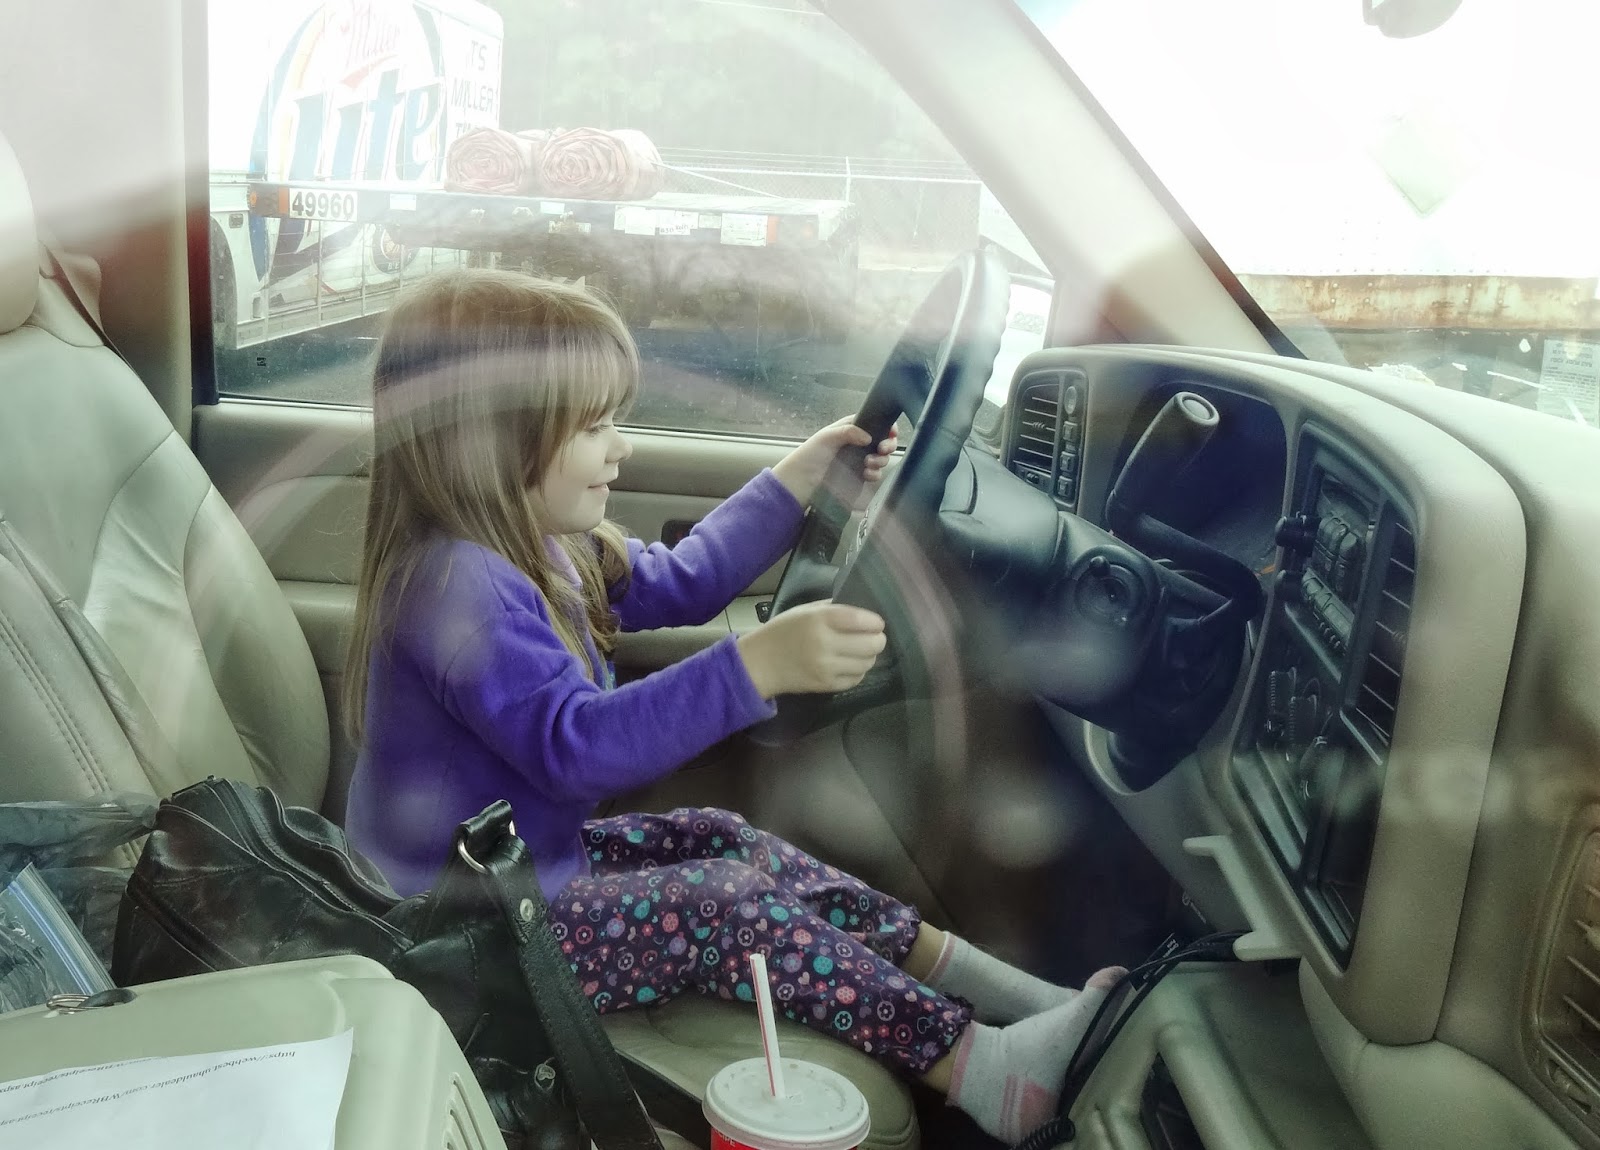
This is my little one pretending to drive while we were stuck at the auto repair place in Augusta, GA. Word to the wise, rent something other than a U-haul. I won't go into detail, but suffice to say, after about 12 hours on day one, we'd only covered a distance that usually takes just two hours. Not a good way to start the trip. Fortunately, there weren't anymore problems once we got back on the road, but by then, I was already pretty frazzled.
Day two began with us in Monteagle, TN. We woke up to LOTS of fog - like all the cliches about pea soup and hands in front of your face were completely true. While we waited for visibility to improve, we had a leisurely breakfast at the Rocky Top Restaurant. If you ever find yourself in Monteagle, you owe it to yourself to stop here. There's very good country cooking, friendly staff, and reasonable prices.
More pics from day two: the Nashville skyline, farm life in Kentucky, my tuckered out crew (traveling with a five year-old, a dog, and a cat isn't easy), and the St. Louis arch. We covered as much ground as we possibly could on day two in an attempt to make up for lost time on day one. It was pretty hard, but I really wanted to get to Montana as close to on-schedule as possible. My husband had been in Billings for the last two months, and we'd missed our 10-year wedding anniversary, Halloween, my husband's birthday, Thanksgiving ,and our daughter's 5th birthday together. When my mother in-law offered to help me move out so we didn't miss Christmas together too, I was grateful, and I didn't want to wait any longer than I had to in order to finish the journey.
When the St. Louis arch came into view, I was a happy camper. I'd been excited to see it since I found out we'd be passing by it on our trip. However, today, the "gateway to the west's" beauty signified something else: our day of driving was nearly done, and better yet, we were halfway to Montana. Twelve hours and four states later, we stopped on the west side of St. Louis and rewarded our monumental driving efforts with dinner at Steak' n Shake.
Day three had us driving through a whole lotta nothin'. To the right is a pic of my little one at a rest stop in Iowa, getting a preview of the snow we had to look forward to. We had to trek the rest of the way across Missouri, into Iowa, and then across the vasty nothingness of South Dakota. To illustrate how little there is in South Dakota, my mom-in-law's husband, in spite of our warnings, decided to forego stopping for gas in Sioux Falls. When we began looking for gas, we finally found a little place several miles off the interstate. This town was so small, the gas station was also the town's grocery store and pizza joint!

On day four, the final day of our journey, we started out about two hours from Rapid City, SD. Over to the right you can see that vasty nothingness I was talking about. Once we got to Rapid City, we took a detour to go see Mt. Rushmore, because coming so close and not seeing it seemed like a crime. After that, we had lunch in Sturgis, SD, where my mom-in-law picked up some souvenir t-shirts at the Harley Davidson shop for her nephew and his wife, who are avid bikers. From there, we made the final push across Wyoming, and I tell you, it was beautiful. The snow on the landscape looked like someone had dusted powdered sugar over a giant donut. There were mountains, antelope, bald eagles, and more deer that I've ever seen in my life! We even got to see Devil's Tower, which is fantastic, because it is literally the only thing around for miles. I'm telling you, if you ever have the opportunity to drive across Wyoming, DO IT! Just fill up on gas first, because if you don't, you might find yourself surveying the landscape on foot with a gas can in one hand.
This picture doesn't do them justice, but here are some of the Bighorn Mountains (I think). And to think this scenery is practically in my backyard! Anyway, after stopping in Sheridan, WY, we got back on the road and finally arrived in Billings at about 8PM. WHEW! Even though I was sleeping on an air mattress because our stuff was still in the truck, I've never slept so hard in my life.
So there you have it. Our four-day driving marathon across the ol' U.S. of A.
This is my little one pretending to drive while we were stuck at the auto repair place in Augusta, GA. Word to the wise, rent something other than a U-haul. I won't go into detail, but suffice to say, after about 12 hours on day one, we'd only covered a distance that usually takes just two hours. Not a good way to start the trip. Fortunately, there weren't anymore problems once we got back on the road, but by then, I was already pretty frazzled.
Day two began with us in Monteagle, TN. We woke up to LOTS of fog - like all the cliches about pea soup and hands in front of your face were completely true. While we waited for visibility to improve, we had a leisurely breakfast at the Rocky Top Restaurant. If you ever find yourself in Monteagle, you owe it to yourself to stop here. There's very good country cooking, friendly staff, and reasonable prices.
When the St. Louis arch came into view, I was a happy camper. I'd been excited to see it since I found out we'd be passing by it on our trip. However, today, the "gateway to the west's" beauty signified something else: our day of driving was nearly done, and better yet, we were halfway to Montana. Twelve hours and four states later, we stopped on the west side of St. Louis and rewarded our monumental driving efforts with dinner at Steak' n Shake.
Day three had us driving through a whole lotta nothin'. To the right is a pic of my little one at a rest stop in Iowa, getting a preview of the snow we had to look forward to. We had to trek the rest of the way across Missouri, into Iowa, and then across the vasty nothingness of South Dakota. To illustrate how little there is in South Dakota, my mom-in-law's husband, in spite of our warnings, decided to forego stopping for gas in Sioux Falls. When we began looking for gas, we finally found a little place several miles off the interstate. This town was so small, the gas station was also the town's grocery store and pizza joint!
On day four, the final day of our journey, we started out about two hours from Rapid City, SD. Over to the right you can see that vasty nothingness I was talking about. Once we got to Rapid City, we took a detour to go see Mt. Rushmore, because coming so close and not seeing it seemed like a crime. After that, we had lunch in Sturgis, SD, where my mom-in-law picked up some souvenir t-shirts at the Harley Davidson shop for her nephew and his wife, who are avid bikers. From there, we made the final push across Wyoming, and I tell you, it was beautiful. The snow on the landscape looked like someone had dusted powdered sugar over a giant donut. There were mountains, antelope, bald eagles, and more deer that I've ever seen in my life! We even got to see Devil's Tower, which is fantastic, because it is literally the only thing around for miles. I'm telling you, if you ever have the opportunity to drive across Wyoming, DO IT! Just fill up on gas first, because if you don't, you might find yourself surveying the landscape on foot with a gas can in one hand.
This picture doesn't do them justice, but here are some of the Bighorn Mountains (I think). And to think this scenery is practically in my backyard! Anyway, after stopping in Sheridan, WY, we got back on the road and finally arrived in Billings at about 8PM. WHEW! Even though I was sleeping on an air mattress because our stuff was still in the truck, I've never slept so hard in my life.
So there you have it. Our four-day driving marathon across the ol' U.S. of A.
Saturday, November 30, 2013
Picture Blog Time! More Paintings!
Here are some more photos of oil paintings I've done using the Bob Ross wet-on-wet technique:
This was the first painting I attempted on my own. I used my lovely new paints and brushes that I got as a birthday gift from my wonderful husband. The picture was inspired by one on the Bob Ross website called "Winter Glow." (Full instructions here.) It's not exactly the same; I couldn't paint that cabin for the life of me. I am satisfied with it though, especially as a first lone attempt.
This painting is from my final class with Melody. I desperately wanted to do this painting because I knew that it would make an excellent gift for my mother who loves lighthouses. It turned out fantastic, except that the reflection of the lighthouse doesn't quite line up with the actual lighthouse. (Shh! Don't tell anyone!) I still think it looks awesome, and I know my mother will be pleased.
This painting started out as a seascape for my sister and her husband. However, I messed up the sky quite early on by adding too much yellow. Instead of scraping off all the paint and re-priming the canvas, I decided to roll with the yellowy sky, and this is what I ended up with - a pretty spiffy desert scene. This is a 100% Ashley original, and I like it. Like Bob Ross said, "There are no mistakes, just happy accidents."
Here is attempt number two at a seascape painting for my sister. You'll notice the sky is much less yellow, and there's water in this one. However, the picture I wanted to paint had a beautiful crashing wave and sand dunes that I just could not get right for the life of me. So I painted some soft swells and called it good. My aunt fell in love with this one, so she's taking it home with her when she comes to visit on Thanksgiving.
This is the third and final attempt at my sister's seascape painting. After watching this video on YouTube, I was able to get that crashing wave down. Fortunately, I also got the dunes right on this one too. It really is just a matter of practice, I think. Trust me, you don't know how many times I scraped off bad waves before I finally got it just how I wanted. Like Bob Ross said, "Talent is a pursued interest. Anything that you're willing to practice, you can do."
And just for fun, I'm going to share this video with you. If you have time, check out the rest of the PBS remix videos. Catch you later!
This was the first painting I attempted on my own. I used my lovely new paints and brushes that I got as a birthday gift from my wonderful husband. The picture was inspired by one on the Bob Ross website called "Winter Glow." (Full instructions here.) It's not exactly the same; I couldn't paint that cabin for the life of me. I am satisfied with it though, especially as a first lone attempt.
This painting is from my final class with Melody. I desperately wanted to do this painting because I knew that it would make an excellent gift for my mother who loves lighthouses. It turned out fantastic, except that the reflection of the lighthouse doesn't quite line up with the actual lighthouse. (Shh! Don't tell anyone!) I still think it looks awesome, and I know my mother will be pleased.
This painting started out as a seascape for my sister and her husband. However, I messed up the sky quite early on by adding too much yellow. Instead of scraping off all the paint and re-priming the canvas, I decided to roll with the yellowy sky, and this is what I ended up with - a pretty spiffy desert scene. This is a 100% Ashley original, and I like it. Like Bob Ross said, "There are no mistakes, just happy accidents."
Here is attempt number two at a seascape painting for my sister. You'll notice the sky is much less yellow, and there's water in this one. However, the picture I wanted to paint had a beautiful crashing wave and sand dunes that I just could not get right for the life of me. So I painted some soft swells and called it good. My aunt fell in love with this one, so she's taking it home with her when she comes to visit on Thanksgiving.
Thursday, March 7, 2013
Poppin' Tags and Fletchin' Arrows
"I'm gonna pop some tags, only got twenty dollars in my pocket..." If you haven't heard this song, you need to. This song has become my theme song. Check out the radio edit here:
Why have I made Macklemore's "Thrift Shop" my theme? On my last trip to South Carolina, the mom-in-law and I made a trip to our favorite thrift store, where I scored four over-sized tees for 99 cents each. I altered the first one to make a cinch tee. I also made a skirt, and from there, it kind of snowballed. I made another skirt, then I altered two shirts I already owned, then I made several repairs to torn clothing that had been sitting in my project bin for months. Since then, I've been opening up my Sewing and Fabric Projects board on Pinterest and saying to myself, "What can I do today?" I think refashioning thrift store finds might just be my new hobby.
Ultimately, that's not what I want to tell you about today. In my last post, I promised to tell you about a part of my Halloween costume that's also a Valentine's Day friendly project. I know Valentine's Day is over and this post is way overdue. I apologize for that; life got in the way and I had other things to attend to. On the bright side, if you like this idea, you have a whole year to get it ready before Valentine's rolls around again! As you know, my WoW toon Leah is a hunter, and so my project was making arrows!
Next, I looked for a user-friendly tutorial that would help me make realistic fletching for my arrows. I came across an article on primitiveways.com called "Fletching by Hand" that ended up giving me all the information I needed. I didn't follow the instructions to the letter, well, because I never really do. I'm a maverick like that. Besides, all I wanted was the basic idea for making an arrow that looks functional. For my fletching, I picked up some natural colored duck feathers from the craft store, and I split them down the quills with a utility knife. I trimmed them up to the approximate size and shape I wanted, then I used a dab of super glue to help hold the feathers in place while I wrapped them with dental floss. I didn't have any natural sinew, but the dental floss looked enough like it to suffice, so that's what I used. As I wrapped, I dipped my fingers in craft glue and slid the dental floss through them so it would adhere nicely without unraveling. And that's really all there is to it! Check back in the near future for my adventures in quiver making!
Labels:
becoming Leah,
cool stuff,
costumes,
crafty stuff,
halloween,
pinterest,
upcycling
Tuesday, December 4, 2012
Fishy Fun Party
So, my little one just turned four, and I have to say, I'm pretty proud of how her party turned out. One day she was sitting on my lap while I was browsing Pinterest, and together we saw this awesome fish cake from Cupcakes Take the Cake. My little one loved this cake so much that right then and there she decided she wanted a fish-themed party. With the help of Pinterest and Oriental Trading, I was able to come up with some pretty nice stuff.
The cake ended up being super adorable. The mama fish was chocolate cake, the babies were yellow cake, and all of them were frosted with a homemade cream cheese frosting. One of these days, I'll learn how to frost without making a complete mess of the cake board, but eh, I don't think too many people noticed. There was one alteration I made to the original cupcake design, and that was to add a fruit slice for the tail. I was going to include fins by cutting a fruit slice in half, but alas, there really wasn't room on the the cupcakes. A word to the wise, if you end up doing this, you won't need NEARLY as many M&M's as I bought. I got three bags, and in hindsight, I probably could have gotten away with one.
A lot of the food was just a matter of creative labeling. For example: carrot sticks were crab legs, bell pepper sticks were calamari, cheese cut into triangles became shark's teeth, and regular old cucumber slices became sea cucumbers. Potato chips and Goldfish crackers were arranged next to each other with a sign that read, "Fish & Chips." PB and J sandwiches became starfish with the use of a handy, star-shaped cookie cutter. Cheese puffs in Dixie cups (turned into buckets by the addition of a pipe-cleaner handle) became "live bait."
Other foods took a little more effort. There was my little squid, relaxing in a tub of ranch veggie dip. He helped make the bell pepper calamari appear a little more convincing. It was super simple, all I had to do was sink a baby bell into the dip upside down, use some gel frosting to make a face, and slip in eight pepper sticks for the legs.
Next were submarine cakes. My daughter has a video called "The Big Submarine" from Little Mammoth Media (they make wonderful educational videos for kids, please take a minute to check them out). I bought it for her so that she could see what life was like for Daddy when he was at sea in the Navy. Little did I know that she would love that video so much. When she saw these, she nearly deafened me as she pointed at the screen and shouted, "MOMMY, CAN WE HAVE THOSE AT MY FISH PARTY?!!" These were made with chocolate filled Twinkies. Yes, we ate collector's items, and they were delicious. All I did was use frosting to "glue" on the M&M windows, and insert trimmed-down bendy straws at one end. If you absolutely love this idea, but fear paying $500 a box for Twinkies, DO NOT FRET. Little Debbie makes Cloud Cakes. I've noticed they're a little harder to find in stores, but you won't spend your child's entire college fund to get them.
I also made oyster cookies. The hardest part of this was finding something to use as pearls. Luckily, my local Hobby Lobby had shiny, white Sixlets in the wedding section. After that, it was a matter of coloring some frosting, frosting the bottom of a Nilla Wafer, adding the Sixlet, and then topping it all with another Nilla Wafer. I don't even like Nilla Wafers or Sixlets, but these cookies were tasty. Something about the flavor combo made them really, really good.
Last, but not least, is the Rice Crispy treat sushi. This was as simple as making Rice Crispy treats, making them into patties, wrapping them with Fruit by the Foot, and topping them with a fish-shaped candy. I did have to use frosting to make the fish candy stick, but I consider this a success, because a lot of my family told me this would be the only sushi they'd ever eat. (My family isn't terribly adventurous when it comes to cuisine.)
We also played several games the kids thoroughly enjoyed. For the first game, the kids got to go fishing for fish-shaped goody bags filled with bubbles, stickers, and necklaces. In the next game, the kids became the fish and had to catch gummy worms hanging from strings with their mouths. As is expected with young children, chaos and hilarity ensued.
The cake ended up being super adorable. The mama fish was chocolate cake, the babies were yellow cake, and all of them were frosted with a homemade cream cheese frosting. One of these days, I'll learn how to frost without making a complete mess of the cake board, but eh, I don't think too many people noticed. There was one alteration I made to the original cupcake design, and that was to add a fruit slice for the tail. I was going to include fins by cutting a fruit slice in half, but alas, there really wasn't room on the the cupcakes. A word to the wise, if you end up doing this, you won't need NEARLY as many M&M's as I bought. I got three bags, and in hindsight, I probably could have gotten away with one.
A lot of the food was just a matter of creative labeling. For example: carrot sticks were crab legs, bell pepper sticks were calamari, cheese cut into triangles became shark's teeth, and regular old cucumber slices became sea cucumbers. Potato chips and Goldfish crackers were arranged next to each other with a sign that read, "Fish & Chips." PB and J sandwiches became starfish with the use of a handy, star-shaped cookie cutter. Cheese puffs in Dixie cups (turned into buckets by the addition of a pipe-cleaner handle) became "live bait."
I also made oyster cookies. The hardest part of this was finding something to use as pearls. Luckily, my local Hobby Lobby had shiny, white Sixlets in the wedding section. After that, it was a matter of coloring some frosting, frosting the bottom of a Nilla Wafer, adding the Sixlet, and then topping it all with another Nilla Wafer. I don't even like Nilla Wafers or Sixlets, but these cookies were tasty. Something about the flavor combo made them really, really good.
Now, you may have noticed the cute little labels I made for the food. That wouldn't have been possible without my mom's Cricut machine. Well, it would have, but it would have taken ten times as long and been a lot more work. Actually, I made quite a few decorations with Mom's machine. I made seashells and starfish to scatter on the tables, as well as fish and seaweed to hang from the ceiling. Speaking of decorations, I thought the room looked fabulous:
| Thank heavens for my parents, my MIL and SIL. I would never have gotten all this set up in time without them. |
When the party was all over, we sent everyone home with favors that I got from Oriental Trading. These little water-filled games were so cute, and my little one loved hers almost as much as she liked her presents.
All in all, I felt it was a big success. It was a lot of work and a little bit stressful, but my philosophy is that eventually, there will come a time when my baby will no longer think my ideas are all that great, and so I might as well go all out while I can. The little one has already informed me that she wants a kitty party next year, and so I will be keeping my eyes open for more good ideas. If you'd like to check out my Pinterest party board, you can do so here: http://pinterest.com/am_crittenden/party-ideas/. Happy party planning!
Labels:
birthdays,
cool stuff,
crafty stuff,
food,
personal,
pinterest
Wednesday, November 7, 2012
Frosted Luminaries
There was one decoration that I did for my Pumpkin Party that I didn't talk about in my previous blog. They're frosted glass luminaries, and they can be used for any occasion where you need a little ambient lighting:
All I did was save up some glass jars, wash them, put on some foil star stickers (the kind you get in the office section of your local big box store), and spray on some glass frosting spray. I've seen ideas similar to this floating around on Pinterest, but most of them call for spray paint, and I personally didn't want to use anything so opaque. For my project, I used Krylon Frosted Glass Finish, mainly because it was the only kind my craft store had at the time. Just make sure your jars are good and clean, make sure all that sticky junk that holds the labels on is gone, and follow the instructions on the spray can. These would be great for Christmas, or even a wedding. You can customize your stickers to any shape, or just leave them off entirely. It's a great little upcycling project that takes only minutes to do.
Now, in case you're wondering, the sticky stuff on the jars I used was pretty stubborn. What I did to get it off was remove the label and rub some petroleum jelly on the adhesive. I let it sit for a day or two, then I scraped as much off as I could with a razor. After that, I washed the jar with HOT water and soap. If it didn't all come off after that, I spritzed it with some Pine-Sol and re-washed the jar with hot water and soap. I've also heard you can used peanut butter, rubbing alcohol, or nail-polish remover. Basically, these things are supposed to weaken the adhesive so that it isn't quite so sticky. I tried them all, and the petroleum jelly worked best for me; I only had to use the Pine-Sol a couple of times as a last resort.
I'm proud of how these turned out. I'm going to keep them handy for my next evening porch get-together. Anyway, that's it for now. Stay tuned for more crafty stuff!
| Like so. |
All I did was save up some glass jars, wash them, put on some foil star stickers (the kind you get in the office section of your local big box store), and spray on some glass frosting spray. I've seen ideas similar to this floating around on Pinterest, but most of them call for spray paint, and I personally didn't want to use anything so opaque. For my project, I used Krylon Frosted Glass Finish, mainly because it was the only kind my craft store had at the time. Just make sure your jars are good and clean, make sure all that sticky junk that holds the labels on is gone, and follow the instructions on the spray can. These would be great for Christmas, or even a wedding. You can customize your stickers to any shape, or just leave them off entirely. It's a great little upcycling project that takes only minutes to do.
Now, in case you're wondering, the sticky stuff on the jars I used was pretty stubborn. What I did to get it off was remove the label and rub some petroleum jelly on the adhesive. I let it sit for a day or two, then I scraped as much off as I could with a razor. After that, I washed the jar with HOT water and soap. If it didn't all come off after that, I spritzed it with some Pine-Sol and re-washed the jar with hot water and soap. I've also heard you can used peanut butter, rubbing alcohol, or nail-polish remover. Basically, these things are supposed to weaken the adhesive so that it isn't quite so sticky. I tried them all, and the petroleum jelly worked best for me; I only had to use the Pine-Sol a couple of times as a last resort.
I'm proud of how these turned out. I'm going to keep them handy for my next evening porch get-together. Anyway, that's it for now. Stay tuned for more crafty stuff!
Labels:
cool stuff,
crafty stuff,
halloween,
pinterest,
upcycling
Wednesday, October 17, 2012
Pumpkin Party!
*You'll notice that I've changed my layout from 3 columns to 2. I feel this squishes my content less, and it hopefully improves the overall appearance and function of my blog.
This past Saturday was our first annual pumpkin carving bonanza. I have to admit, as much as I love Halloween, inviting everyone over was actually my husband's idea. I'm glad he had it though, because we had a good, albeit tiring time. I spent the week before making decorations and lots of goodies for the party.
I decided to keep the decorations simple and fun. On the porch, I did streamers and spider webs, complete with pipe cleaner spiders that my little one helped me make.
Indoors, I did a small vignette with decorations that I collected over the years.
The food was to die for. (Ha! See what I did there?) Our menu included:
*Recipes coming in a later blog.
Sounds good, huh? It looked good too!
All in all, I think our guests had a great time. They carved some snazzy pumpkins too!
After the party was over, since I didn't need the extra seating, I added some more decor to my porch.
I don't expect to get many trick-or-treaters out here in the country, but that won't stop me from getting into the spirit of the season. (Spirit, get it? I kill me! Oh, look I did it again! Okay, I'll stop now, I promise.)
So yeah, that's what I've been up to. Hope you enjoyed the blog, and stay tuned for those recipes. See you next time!
This past Saturday was our first annual pumpkin carving bonanza. I have to admit, as much as I love Halloween, inviting everyone over was actually my husband's idea. I'm glad he had it though, because we had a good, albeit tiring time. I spent the week before making decorations and lots of goodies for the party.
I decided to keep the decorations simple and fun. On the porch, I did streamers and spider webs, complete with pipe cleaner spiders that my little one helped me make.
Indoors, I did a small vignette with decorations that I collected over the years.
The food was to die for. (Ha! See what I did there?) Our menu included:
- Grilled BBQ chicken (the hubby's specialty)
- Mashed potatoes
- Corn on the cob
- Salad
- Stuffed jack-o-lantern peppers* (pic here)
- Witch finger pretzels
- Scarecrow treats
- Veggies and crackers with ranch dip
- Tortilla chips and homemade salsa
- Fruit with caramel cheesecake dip*
- Honey oat quick bread (which makes great French toast the next morning!)
- Autumn brittle
- Haystacks (sans the marshmallows)
- Graveyard gravel fudge
- Homemade eggnog*
- Apple pie with crumb topping*
*Recipes coming in a later blog.
Sounds good, huh? It looked good too!
| And that's just the snack table! |
After the party was over, since I didn't need the extra seating, I added some more decor to my porch.
| Drinking wine from Solo cups? Stay classy, skeletons! |
I don't expect to get many trick-or-treaters out here in the country, but that won't stop me from getting into the spirit of the season. (Spirit, get it? I kill me! Oh, look I did it again! Okay, I'll stop now, I promise.)
So yeah, that's what I've been up to. Hope you enjoyed the blog, and stay tuned for those recipes. See you next time!
Monday, October 1, 2012
Not Feeling it Today...
These last few days I've just been going through the motions. I haven't been able to sleep at night, but having a little one means I can't sleep during the day either. Caffeine doesn't help, so I've been shuffling around like a zombie. An irritable zombie. I try not to be crabby around my little one, but she's so bouncy and happy and chatty, and I'm so...well, not. Seeing happy people when I'm in this mood doesn't make it better. However, with any luck, I'll be in bed (and asleep, that's the key) at a reasonable hour tonight so I can be my usual self tomorrow.
At any rate, there were two highlights of this past week for me. One, my husband built us a lovely fire pit and outdoor shed, so our new rental is becoming more and more homey all the time. I love bonfires, and my love finished our fire pit just in time to enjoy some of the first cool nights of fall. We had a lovely visit from some friends and roasted marshmallows while the kiddos played with flashlights in the dark. The second highlight was the release of World of Warcraft's fourth expansion, Mists of Pandaria.
The above picture is my main, Leahsidhe, riding a kite across the isle of Pandaria. The graphics for this expansion are amazing, so I've been taking screenshots like nobody's business. (That is a link to my facebook WoW album, which is supposed to be public, so I hope you guys can see it.) But seriously though, Blizzard needs to give their art and graphics departments a big raise, because it's almost like playing in a painting. That's not all that's good about it, though. I'm having fun meeting the Pandaren and learning about their culture and history. There are several fun quest chains, particularly the quests with Riko and Kiryn on the Horde side, and the quest to smash hozen with the giant yeti in Kun'Lai Summit. There's also lots of extra funny stuff, like the interactive cauldrons on the Isle of Reckoning, or when you pass by Pandaren locals and they comment on how strange or skinny you look. As a hunter, I'm digging all the new tameable creatures out there. So yeah, I'm not quite 90 yet, but I'm enjoying the journey. Also, I'm going to confess about being wrong. In my last post, I said that MoP would be a lighthearted break from the drama of Azeroth, but it seems that tensions between Horde and Alliance are at an all time high, and the reappearance of the Sha is all our fault. Sha are big, bad, and feed on negativity. They stayed buried in Pandaria for centuries, then we show up with our faction war, and well GUESS WHAT:
Anyway, that's all for me today. Next week I should have a lovely blog about all the crafty stuff I've been doing. We'll see!
At any rate, there were two highlights of this past week for me. One, my husband built us a lovely fire pit and outdoor shed, so our new rental is becoming more and more homey all the time. I love bonfires, and my love finished our fire pit just in time to enjoy some of the first cool nights of fall. We had a lovely visit from some friends and roasted marshmallows while the kiddos played with flashlights in the dark. The second highlight was the release of World of Warcraft's fourth expansion, Mists of Pandaria.
The above picture is my main, Leahsidhe, riding a kite across the isle of Pandaria. The graphics for this expansion are amazing, so I've been taking screenshots like nobody's business. (That is a link to my facebook WoW album, which is supposed to be public, so I hope you guys can see it.) But seriously though, Blizzard needs to give their art and graphics departments a big raise, because it's almost like playing in a painting. That's not all that's good about it, though. I'm having fun meeting the Pandaren and learning about their culture and history. There are several fun quest chains, particularly the quests with Riko and Kiryn on the Horde side, and the quest to smash hozen with the giant yeti in Kun'Lai Summit. There's also lots of extra funny stuff, like the interactive cauldrons on the Isle of Reckoning, or when you pass by Pandaren locals and they comment on how strange or skinny you look. As a hunter, I'm digging all the new tameable creatures out there. So yeah, I'm not quite 90 yet, but I'm enjoying the journey. Also, I'm going to confess about being wrong. In my last post, I said that MoP would be a lighthearted break from the drama of Azeroth, but it seems that tensions between Horde and Alliance are at an all time high, and the reappearance of the Sha is all our fault. Sha are big, bad, and feed on negativity. They stayed buried in Pandaria for centuries, then we show up with our faction war, and well GUESS WHAT:
| Source. |
Wednesday, September 19, 2012
All moved in...
So I was doing pretty well there for a while, wasn't I? Blogging every week, keeping you up to date on the ins and outs of life. Well, then we moved. Our little family was living in chaos while living out of boxes for a couple of weeks there in mid-August, but now I can officially state that we're all moved in. Now it's time to get back on the blogging train. So here's a little peek at what I've been up to:
That is one of the fingerless gloves I made from a pair of Halloween knit tights. I bought the tights thinking it would be fun and quirky to have a pair of stripey stockings in my wardrobe, but the "one size fits all" label evidently meant all children, because I am a short adult, and I could not get them up to my waist. Anyway, I threw them in my fabric bin because I paid for them, and I wasn't about to throw them away. (In case you're wondering, returning them was out of the question because in my fervor to put them on I put a hole in them.) So I got them out the other day after deciding that I wanted to be a witch for Halloween - just to make sure they really wouldn't fit. Sure enough, they were still too short. After staring at them for a few minutes, wracking my brain as to how I could use them, I said, "Screw it." I threw caution to the wind, and cut them off at the stripe where they reached my knees. I fray-checked the ends, and put them on. To my surprise, the ends didn't roll down and the socks stayed put, so I have a new pair of striped knee-socks. Well, I still had the tops. I thought about throwing them away, but a friend of mine posted a picture of some fingerless gloves for another friend of mine, and eureka! I made two tubes out of the tops, cut thumb holes in the sides, fray-checked the whole thing and now I have fingerless gloves. I've always kinda wanted some because my hands get cold when I'm on the computer or doing crafts, but I don't want to put on gloves because I lose all my manual dexterity that way. So there, problem solved. I didn't throw away money on ruined tights, and I got two articles of clothing out of the deal. Upcycling at its finest!
Now, I mentioned that I wanted to be a witch for Halloween. Obviously a witch needs a hat, but a witch hat is not one of the things I have in my arsenal of Halloween goods, believe it or not. I found one at Target for $2.50, and it was purple! (Purple is one of my favorite colors AND the color of the dress that was going to be the foundation for my costume.) For $2.50, I was expecting a basic hat with no frills whatsoever, but it had tulle, feathers, and a satin flower on it. That being said, it still looked a little cheap because the ends of the feathers were showing. Me being me, I cruised on to Hobby Lobby and picked up a pack of six small, sheer black roses with a rhinestone in the center of each one for $1.99. I hot-glued those bad boys on, and now for $4.49, I have a pretty snazzy witch hat:
And here's a close-up of the flowers:
That is one of the fingerless gloves I made from a pair of Halloween knit tights. I bought the tights thinking it would be fun and quirky to have a pair of stripey stockings in my wardrobe, but the "one size fits all" label evidently meant all children, because I am a short adult, and I could not get them up to my waist. Anyway, I threw them in my fabric bin because I paid for them, and I wasn't about to throw them away. (In case you're wondering, returning them was out of the question because in my fervor to put them on I put a hole in them.) So I got them out the other day after deciding that I wanted to be a witch for Halloween - just to make sure they really wouldn't fit. Sure enough, they were still too short. After staring at them for a few minutes, wracking my brain as to how I could use them, I said, "Screw it." I threw caution to the wind, and cut them off at the stripe where they reached my knees. I fray-checked the ends, and put them on. To my surprise, the ends didn't roll down and the socks stayed put, so I have a new pair of striped knee-socks. Well, I still had the tops. I thought about throwing them away, but a friend of mine posted a picture of some fingerless gloves for another friend of mine, and eureka! I made two tubes out of the tops, cut thumb holes in the sides, fray-checked the whole thing and now I have fingerless gloves. I've always kinda wanted some because my hands get cold when I'm on the computer or doing crafts, but I don't want to put on gloves because I lose all my manual dexterity that way. So there, problem solved. I didn't throw away money on ruined tights, and I got two articles of clothing out of the deal. Upcycling at its finest!
Now, I mentioned that I wanted to be a witch for Halloween. Obviously a witch needs a hat, but a witch hat is not one of the things I have in my arsenal of Halloween goods, believe it or not. I found one at Target for $2.50, and it was purple! (Purple is one of my favorite colors AND the color of the dress that was going to be the foundation for my costume.) For $2.50, I was expecting a basic hat with no frills whatsoever, but it had tulle, feathers, and a satin flower on it. That being said, it still looked a little cheap because the ends of the feathers were showing. Me being me, I cruised on to Hobby Lobby and picked up a pack of six small, sheer black roses with a rhinestone in the center of each one for $1.99. I hot-glued those bad boys on, and now for $4.49, I have a pretty snazzy witch hat:
I seriously like this hat enough to wear it without a reason.
Monday, August 6, 2012
Fall Anticipation and Other Randomness
Well, today's post is going to be short. I have a few craft projects on the table right now, but nothing is ready for me to do a blog about. So, I'm just going to talk about a few things going on with me.
Even though it's still HOT, HOT, HOT outside, I can feel fall coming. There's something about the sky now that says autumn is on its way*, and believe it or not, some of the leaves around here are starting to turn. I can't wait for cooler weather, fairs, bonfires, apple cider, beautiful foliage, mums, asters, and HALLOWEEN. It makes me so giddy I want to squeal!
What also makes me giddy is our new house. We signed the lease two weeks ago, and since we've been moving our stuff over one truckload at a time. I like our new place more and more each time I go over, so I think we're going to be really happy there. I sure am looking forward to enjoying a cup of coffee on our new porch!
I just found out recently that the Mists of Pandaria expansion for World of Warcraft is coming out at the end of September. I'm excited and a little surprised that it's coming out then; it's sooner than I expected. This means I have some work to do, like finish leveling some toons I wanted to have ready for the new content. Guess I'll be spending some time in Azeroth!
*For you science buffs, I did a little research because I wanted to know if I was just crazy or if there really is something to my feeling that the sky is indicating the coming autumn. I can't actually explain what I pick up on that makes me recognize the change of the season, but here's what I discovered: because of Earth's tilt, the sun appears higher in the sky during the summer than it does in the winter. This causes a change in the appearance of the sky's color, due to a phenomenon called Rayleigh scattering (what makes the sky blue). The change would be pretty subtle and would vary based on latitudes, but the lowest estimate I've seen about human color perception is that we can see approximately 2 million different colors, and I've also seen estimates as high as 10 million colors. Color variations are subjective, but it probably is possible for a person to pick up on a change in the sky's hue. Read about it all here:
http://www.morehead.unc.edu/Shows/EMS/seasons.htm
http://www.madsci.org/posts/archives/1998-10/909280669.Ph.r.html
http://en.wikipedia.org/wiki/Rayleigh_scattering
http://en.wikipedia.org/wiki/Color
Even though it's still HOT, HOT, HOT outside, I can feel fall coming. There's something about the sky now that says autumn is on its way*, and believe it or not, some of the leaves around here are starting to turn. I can't wait for cooler weather, fairs, bonfires, apple cider, beautiful foliage, mums, asters, and HALLOWEEN. It makes me so giddy I want to squeal!
What also makes me giddy is our new house. We signed the lease two weeks ago, and since we've been moving our stuff over one truckload at a time. I like our new place more and more each time I go over, so I think we're going to be really happy there. I sure am looking forward to enjoying a cup of coffee on our new porch!
I just found out recently that the Mists of Pandaria expansion for World of Warcraft is coming out at the end of September. I'm excited and a little surprised that it's coming out then; it's sooner than I expected. This means I have some work to do, like finish leveling some toons I wanted to have ready for the new content. Guess I'll be spending some time in Azeroth!
*For you science buffs, I did a little research because I wanted to know if I was just crazy or if there really is something to my feeling that the sky is indicating the coming autumn. I can't actually explain what I pick up on that makes me recognize the change of the season, but here's what I discovered: because of Earth's tilt, the sun appears higher in the sky during the summer than it does in the winter. This causes a change in the appearance of the sky's color, due to a phenomenon called Rayleigh scattering (what makes the sky blue). The change would be pretty subtle and would vary based on latitudes, but the lowest estimate I've seen about human color perception is that we can see approximately 2 million different colors, and I've also seen estimates as high as 10 million colors. Color variations are subjective, but it probably is possible for a person to pick up on a change in the sky's hue. Read about it all here:
http://www.morehead.unc.edu/Shows/EMS/seasons.htm
http://www.madsci.org/posts/archives/1998-10/909280669.Ph.r.html
http://en.wikipedia.org/wiki/Rayleigh_scattering
http://en.wikipedia.org/wiki/Color
Monday, July 9, 2012
Is it that time again?
It feels like it's been ages since I last blogged. Quite a bit has happened this week. We're still enduring a heat wave, and I swear that our little AC is losing the battle. We're supposed to get a reprieve from the high temps this week, and I so hope they're right. We had quite a storm not too long after I finished my last blog post, complete with golf ball-sized hail and hurricane-force winds. One of the pine trees out front decided to split open and fall over right in front of the house, and I am SO, SO grateful it decided to fall AWAY from the house.
Had the wind been blowing the opposite direction, our master bedroom would have been crushed. That would have most certainly moved our rental search priority to DefCon 1. Speaking of which, last Thursday we took a look at a rental property that we liked very much. We may not get it because it's a tiny bit more expensive than we would like, but hey, at least we found something. That's a great improvement over the "no pets, no longer available" luck I've been having. We will prevail. With time and perseverance, we'll find a place that's both in our target price range and has the features we're looking for.
Now that I've given you a personal update, here is the real reason I'm posting today: HOMEMADE STRAWBERRY CHEESECAKE ICE CREAM.
This stuff is delicious, and it wasn't difficult to make! I found the recipe in a Philadelphia Cream Cheese advertisement in my latest issue of Better Homes and Gardens. It really does taste like cheesecake with strawberry topping. It even has graham crackers in it! I made this for dessert as part of our Independence Day celebration, and I have to say, I'm pretty proud of myself. Anyway, without further adieu, here's the recipe:
Strawberry Cheesecake Ice Cream, courtesy of Philadelphia Cream Cheese
Ingredients:
PSSST! By the way, you don't have to use the name brand stuff. I didn't. But don't tell Kraft I told you that.
| Look at this tree. Just look at it. All falling over and crap. |
Now that I've given you a personal update, here is the real reason I'm posting today: HOMEMADE STRAWBERRY CHEESECAKE ICE CREAM.
| Wipe your chin; you're drooling. |
Strawberry Cheesecake Ice Cream, courtesy of Philadelphia Cream Cheese
- 1 pkg. (8 oz.) PHILADELPHIA Cream Cheese, softened
- 1 can (14 oz.) sweetened condensed milk
- 1/3 cup whipping cream
- 2 tsp. lemon zest
- 1-1/2 cups fresh strawberries
- 3 HONEY MAID Honey Grahams, coarsely chopped
- Mix first 4 ingredients with mixer until well blended. Freeze 4 hours or until almost solid.
- Beat cream cheese mixture with mixer until creamy. Blend berries in blender until smooth. Add to cream cheese mixture with chopped grahams; mix well. Freeze 8 hours or until firm.
- Remove dessert from freezer 15 min. before serving; let stand at room temperature to soften slightly before scooping into dishes.
PSSST! By the way, you don't have to use the name brand stuff. I didn't. But don't tell Kraft I told you that.
Subscribe to:
Posts (Atom)