Monday, October 6, 2014

More Sugar Skulls

So you know how last week I said I wanted a whole house full of those skulls I painted? TA-DA!


I picked up three more skulls from Dollar Tree and had a ball. The purple one is probably my favorite. I really like these. Think I should do more?

Monday, September 29, 2014

Dia de los Muertos Skull

So I'm having a pumpkin carving party next month, and the theme is Day of the Dead. I've been scouring my favorite websites and local stores to find clever party supplies and decor. I thought I'd hit the jackpot when I found these online:


They are a set of Jewel Eye Skulls from the Los Muertos collection at World Market. Adorable, right? Well, I visited my local World Market to get a better look at these babies, and was disappointed to find that they're made of foam. From the looks of the picture I was expecting solid plastic, maybe ceramic if I was lucky, but nope, foam. Well, I wasn't about to pay $20 for something that would blow away if I turned my ceiling fan on too high. 

Luckily, my local Dollar Tree had these:


These are 6-inch, hollow plastic skulls. The one I bought had a little better paint job, but it was still your basic cheap, not scary. blow-molded plastic skull. But it was only a dollar, and I had a plan. You know me. I always think, "Why should I buy something when I can make it for less?" 

My next step was to purchase a 40-pack of 18mm acrylic jewels from Walmart for $2.50. I had all the paint I needed at home, including black and antique white acrylic paints, as well as a can of Rustoleum black primer for plastics and some Rustoleum spray-on clear enamel. I gave my Dollar Tree skull a good coat of primer:


Then I went to work on the details with a fine-tipped brush and my acrylic paint. Once that was dry, I sprayed on my enamel coat to make it shiny. Finally, using a hot glue gun, I added two purple rhinestones. Voila!


Isn't it wonderful? I didn't use quiet the same design as the World Market version, but I think I like this one better. I'm definitely going to make at least one more for my party. I love this one so much I kind of want a whole house full of them, and not just during Halloween, either!

Well, that's all for now. Happy crafting, folks!


Wednesday, September 24, 2014

Salsa Verde

So I made salsa, and I didn't take pictures. *GASP* I know, it's tough to believe. Time was kind of a factor though. About a week ago, we had a sudden cold snap that resulted in a hard frost that prematurely killed my garden. Excuse me while I take a minute to go sob in a corner... See, what you have to understand was that I was extremely proud of my garden, because it's the first real one I've had - I'm talking plants in the ground and a fence and everything. Did I mention I started it all from seed? If you know me at all, you know I don't have much luck with seed starting, and that usually results in a trip to the garden center to buy transplants. And when a freak hail storm in early spring destroyed my newly transplanted seedlings, I raised replacement plants from seed all over again. I was amazed at the success I had this growing season. Anyway, the god-awful frost froze my plants solid, and so I was left with a bunch of green tomatoes and half-ripe tomatillos on dead vines. Fortunately, I could spare the fruit, but I knew they wouldn't last long unless they were processed immediately. A quick internet search brought me to a recipe for salsa verde made from green tomatoes. I figured I could use this same recipe for both my tomatillos and my green tomatoes, and turns out I was right. It rendered a delicious batch of salsa verde that I will proudly serve at my upcoming Day of the Dead-themed pumpkin carving party (more on that in a later post).

So here's the recipe, copied from Ball's Fresh Preserving Website (link above):

YOU WILL NEED:

  • 7 cups chopped cored peeled green tomatoes (about 12 medium)
  • 5 to 10 jalapeno, Habañero or Scotch bonnet peppers, seeded and finely chopped
  • 2 cups chopped red onion (about 2 large)
  • 2 cloves garlic, finely chopped
  • 1/2 cup lime juice
  • 1/2 cup loosely packed finely chopped cilantro
  • 2 tsp ground cumin
  • 1 tsp dried oregano
  • 1 tsp salt
  • 1 tsp freshly ground black pepper
  • Ball® (8 oz) half pint glass preserving jars with lids and bands 

DIRECTIONS:

  1. PREPARE boiling water canner. Heat jars in simmering water until ready for use. Do not boil.  Wash lids in warm soapy water and set bands aside.
  2. COMBINE tomatoes, peppers, onion, garlic and lime juice in a large saucepan. Bring to a boil. Stir in cilantro, cumin, oregano, salt and pepper. Reduce heat and simmer 5 minutes.
  3. LADLE hot salsa into hot jars leaving 1/2 inch headspace. Remove air bubbles. Wipe rim. Center hot lid on jar. Apply band and adjust until fit is fingertip tight.
  4. PROCESS filled jars in a boiling water canner for 20 minutes, adjusting for altitude. Remove jars and cool. Check lids for seal after 24 hours. Lid should not flex up and down when center is pressed.
    Quick Tip: Use from 5 to 10 hot peppers to reach the level of heat you desire. When cutting or seeding hot peppers, wear rubber gloves to prevent hands from being burned. 

    A little info about my process: I didn't seed my jalapenos. I like medium to hottish salsa, and jalapenos for the most part don't contain that much kick to me. If you like a mild salsa, you absolutely MUST seed your peppers. You could also try using bell peppers in place of hot peppers to help turn down the heat. Also, I tried the little trick where you blanch the tomatoes first and then dunk them in ice water to help with the peeling process. I don't know if it was because the tomatoes were green, but it didn't really work as well as it does with ripe tomatoes. Just be aware that you may have to pull out our vegetable peeler for this one.

    I also made a batch of red salsa, but I had to supplement with canned, diced tomatoes from the supermarket because I didn't have enough homegrown, ripe tomatoes. I used the same recipe I blogged about a couple of years ago. That blog has pictures, for all you visual types! Later, taters!

    Monday, September 15, 2014

    Minecraft Birthday Preparations

    We're back to talking about birthday parties! This year, my little one wants a Minecraft themed party. Daddy introduced her to "the block game" when she was very small. Since then she's grown to love everything about it.

    A Minecraft themed party in some ways is simple because everything in the game is block shaped. However, this type of party presents a challenge because there just isn't that much to be found in the way of themed party supplies. Fortunately for me, I have left over boxes from our recent move to Montana, a color printer, and access to the internet. Lots of creative people have made free printables featuring textures from the game, which allows me to turn ordinary Dollar Tree party favors:


    Into Minecraft themed party favors:


    Likewise, all it took was some scissors and glue to go from this plain cardboard box:


    To these neat table decorations:


    For invites, party banners, food placards, and bottle wraps, go here.

    Well, I've got a little more in the ideas department here, but I don't want to give it all away at once. In the past, I'd do a GIANT birthday post with all my ideas and pictures shoved in there, but this year I want to do it differently. I'll post a few ideas at a time, and then when party day has come and gone, I will post overall pictures and then link you to the individual idea posts. I figure it'll make things a little less overwhelming in the end. As always if you want to see some Minecraft ideas that may or may not have made the cut, check out my Pinterest Party Ideas board.

    Catch you later, friends!


    Wednesday, September 3, 2014

    Superhero Costume Update

    Happy belated Labor Day, everyone! I hope you all had a good time on your day off. I have some new photos I want to share with you. I've been working on my little one's Halloween costume. She wants to be a superhero this year, and she's designed it all herself (with a little help from Mom, of course).

    So I recently finished her snazzy cape:


    As you can see, it's quite flashy. Just the right amount of sparkle for my little one (i.e. A LOT). Anyway, I want to take a minute to brag about the neck of this cape. I used red double-fold bias tape to line the neck so it wouldn't be too itchy. Well, if you remember some of my pics of the quilted exercise mat I did, you know that sewing bias tape isn't my strong suit. However, I NAILED it this time. The neck lining is as smooth as can be! Between advice from my mom-in-law and this tutorial, I finally got a binding I can be proud of. And that was sewing on a curve too!

    Beside the cape you see the costume's shiny belt. I love the gold star! I've also finished the mask, which is made from the same purple material as the belt. I don't have a picture of it yet, but I will soon. You may remember me stating that I was done with her tunic. Well... we had a little setback. I was done, until I had the kiddo try it on. It looked just awful. The superhero symbol on her chest was way too big; so much so that it went under her belt. The dress also hung on her like a potato sack. Definitely not the quality a superhero would expect, not by a long shot. So it's back to the sewing machine to fix my mistakes. I've got the tunic finished with the exception of the superhero symbol, and when that's done, I'll take some more pictures.

    Currently I'm saving the daunting task of sewing the boots and gloves for last. I'm not confident in my ability to sew stretchy fabric just yet. Good thing it's only the beginning of September, right? TTFN, friends!


    Saturday, August 30, 2014

    Ladybug Birthday Party

    Continuing the theme of birthday party ideas, I'd like to share with you the first themed birthday party I ever did - my little one's Ladybug 3rd birthday party. Since my daughter was a baby, she has always loved ladybugs. This led my mom-in-law to start calling her ladybug, and it also inspired me to try this party.


    As far as parties go, this one was pretty simple. The only party decor I made myself were the neon colored ladybugs. I ended up tracing, cutting, and coloring the dots on neon poster board to make about 50 ladybugs. I combined this with polka-dotted balloons from Walmart, and flower-shaped fan foldouts from Oriental Trading.

    The food was standard party food: pizza, chips, fruit, etc. Instead of a cake, I did cupcakes which I decorated with ladybug and flower-shaped candies (the kind you get in the cake decorating isle.) I then arranged them to look like a field (in my mind, anyway.)

    For favors, each kid got foil crowns and bubbles in ladybug bottles. The kids loved the bubbles, and even the adults got in on the fun. Between the bubbles and the balloons that I left on the floor for the kids to play with, I didn't even need any party games. It doesn't take much to entertain a toddler, apparently.


    It doesn't take much to entertain teens, either.


    Were I doing this party today, I probably would do a few things differently. I'd probably have made the flower ceiling hangers myself instead of buying them. I would have planned a couple of simple party games. I would have done more themed food. I would have used a piping tip to make the green frosting on the cupcakes look more like grass. I would have put more flowers and ladybugs on the cupcakes. In the end, however, those things are just for my satisfaction. My daughter had a blast at this party, and so did the other littles that came. 

    It doesn't take much to make a kid's birthday special. Whatever party you want to do, just go for it. They'll love it!


    Wednesday, August 27, 2014

    How to Train Your Dragon Birthday Party

    These ideas are from my nephew's party two birthdays ago, but I decided to share them with you now because How to Train Your Dragon 2 was released earlier this summer, and some of you might need some ideas! Note: I can't take credit for these ideas; they were all my mom-in-law's.

    My sister-in-law claims to not have a crafty bone in her body, so when her son wanted a How to Train Your Dragon birthday party, she turned to her mom for help with the games. The movie focused on two things - how to fight dragons, and how to befriend dragons. With this in mind, my mom-in-law came up with two games.

    The first game was a bean bag toss. My mom in law is quite good at painting, so she took the side of a refrigerator box and painted a three-headed dragon. After cutting out the dragon's mouths, she then sewed bean bags into the shape of fish. At the party, the kids did their best to feed the dragon by tossing the fish into his mouths.


    As an added bonus, the dragon's mouths turned out to be a pretty good photo prop as well:

    Now surely you're seeing those nifty shields and wondering what that's all about. My mom-in-law cut all those shields from cardboard, gave them a faux wood paint treatment, and gave them to the kids so they could defend themselves in the next game. The dragon, played by one of the adults, hurled fireballs made of red and yellow satin tied around balled up newspaper at the kids, and they had to use their shields not to get hit. We played this game several times.


     The kids really loved this one, and at the end, they all rushed the dangerous dragon to slay him!

    As part of their training, our young vikings also tested their strength in tug of war. This was a game that was specifically requested by the birthday boy.


    Then it was time to feast and have cake. My mom-in-law had a plan for that too. She made signs and came up with clever names to turn party food into HTTYD themed food. We had Dragon Egg grapes, Dragon Scale doritos, Dragon Wings chicken wings, and Dragon Teeth bugles.
    The cake was also quite lovely because of a HTTYD edible cake decal my sister-in-law applied.

    As favors, each child got a viking helmet, the shield mom-in-law made for them, and several HTTYD coloring pages that were found free on the internet. It was a great party!


    Sunday, August 24, 2014

    A Nyan Cat Birthday

    I promised you a while back I would tell you about my little one's party this past November. Well, today I'm going to share that with you.

    Do you know Nyan cat? If you don't, check this out:

    Well, there you have it. That's all it is. Not much to go on for a party, huh? Yet, this video consists of a cat, a pop-tart, stars, a rainbow, and an annoying-yet-catchy tune. This is the stuff my little one's dreams are made of, and so this is the theme she picked for her fifth birthday.

    I started off with the cake. A Google search led me to this, which I set out to copy, sans the flowers. Not to brag, but I think I might have nailed it :).  My next idea was to expand on the Nyan cat theme by combining ideas for rainbow parties with ideas from kitty cat themed parties. This is what I came up with:

    The large Nyan Cat was drawn on a grid-lined poster board (which helped immensely with the pixel look). The letters I cut out by hand from some colored cardstock. The blue star balloons, blue table covers, and streamers I purchased from our local Party City.

    To create the rainbow ceiling decorations below, I purchased small diameter dowels, cut them to size and then glued streamers to them in ROYGBV order. The star dangles were purchased from Walmart.

    The centerpieces I made myself. I couldn't find any satisfactory ones at the time, so I found a picture of Nyan cat online, printed it, cut it out, and attached it to a bamboo skewer. I then put that skewer in a small cup filled with quick-setting concrete, along with some curled pipe-cleaners. After the concrete was set, I tied some blue cellophane around the cup with some prismatic silver curling ribbon, and attached some silver star stickers to the side. That, along with some star confetti was the perfect decor for my tables.

    For favors, I made kitty ears out of colored headbands and felt. The other thing I did was make a basket of kitties that were "free to a good home." They were made of cardstock and had different designs for the kids to take home and color. As an added bonus, they also had Pixy-Stix whiskers. I also bought a few random party favors to give out after the games. The winners of each game got a big treat bag filled with several prizes, while everyone else got to pick one toy from the prize box.

    This year, I kept the games simple. We played "Pin the Rainbow on Nyan Cat," a variation of "Pin the Tail on the Donkey." We also did musical chairs to the Nyan Cat theme, but for the adults' sakes, I used the slightly less annoying piano cover :). Musical chairs was such a hit, the kids asked if they could play it twice. You can tell by the blurry, yet smiling faces below that everyone had a good time.

    The food was simple and delicious. As with everything else, I stuck with either a rainbow or cat theme. The tent labels for the food I made with Microsoft Word. I printed out the labels and glued them to folded cardstock. For the rainbow fruit, I chose red apples, peaches, dried pineapple, green grapes, and blueberries with a lovely whipped fruit dip. To make the fruit dip, all you do is combine 8 oz. of softened cream cheese with 8 oz of Cool Whip and a 7 oz jar of marshmallow creme, and beat until fluffy. My daughter loves cheese, so I had a plate of colby-jack cubes that I called "mouse bait." Another idea I had was to use a cookie cutter to make fish-shaped peanut butter and jelly sandwiches, or "peanut butter and jellyfish" sandwiches. Since, you know, cats are crazy for fish. I also made a veggie and cracker tray with a buttermilk ranch cheese ball that I made to look like a ball of yarn with some cream cheese and a flat cake frosting tip. Of course, we also had pop-tarts in several flavors! However, I think my absolute favorite themed food from this party was the chocolate mice. You heard right, mice.


    I got my idea from this pin. However, my little one doesn't eat cherries or almonds, so I needed something else that would work. What I found was Walgreen's Good & Delish Mini S'mores. Wanna make these? Gather mini s'mores, fudge stripe cookies, Hershey's kisses, and chocolate candy bark. Carefully melt the chocolate bark in the microwave ten seconds at a time. Spoon the melted bark into a piping bag with a small round tip (I don't know what number tip mine was, honestly). On a sheet of wax paper, start piping as many pairs of ears as you will need. While those are cooling, pipe some chocolate onto the bottom of the mini s'more, then attach it to the cookie. Then, pipe a small tail coming from the edge of the mini s'more. Once the ears have hardened, they can be carefully peeled from the wax paper. To attach the ears to the head, pipe a small amount of chocolate onto the Hershey's kiss, then stick the ears on. After that, pipe some chocolate onto the mini s'more, then attach the head to the body. You may have to hold the head in place for a second while the bark hardens. Repeat until you have the desired number of mice. Note that you might need to reheat the chocolate bark as you're working with it. This can be done by making sure the piping bag is sealed, and dipping it into a bowl of hot water (just uncomfortable to the touch, not boiling).

    Well, there you have it, a Nyan Cat birthday party fit for a five-year old. As always, you can check out my Party Ideas board on Pinterest for more stuff to make your next party spectacular. See you next time!

    Wednesday, August 13, 2014

    Halloween (Already!)

    So here we are in the month of August, and I'm already in a fall frame of mind. I'm making Halloween costumes! My little one has decided to be a superhero, one of her own design. She showed me the colors, style, and even the superhero symbol she wanted for her costume, and I'm happy to oblige. So far, I've finished her top and belt, and I'm about 85% done with her mask. All that's left is the cape, gloves and boots.

    This costume presents a challenge for me because I'm working with a sparkly, stretchy fabric (I don't know what it's called). I'm not exactly an experienced seamstress, so stretchy fabrics are tough! Wish me luck! I'll post some pics as soon as I find my stupid camera cord. :)

    Until next time, friends!

    Monday, August 4, 2014

    Vacation of sorts

    I can't believe it's been three months since my last post. I wish I could claim that I was uber-busy, but truthfully, I wasn't. I mean, I got a new car. Oh, and my family and I have done a few things, including a camping trip to Yellowstone, and a road trip to San Diego to see the in-laws. But aside from that I haven't been up to anything amazing. I can't really explain my posting slump, but what I can say is I'm back. I have stuff to tell you too! Right now, though, it's late, and I have to get in bed. Check back soon, because I have stories, friends!


    Tuesday, April 29, 2014

    Spring in Full Swing

    We've had a nice warm streak here in Big Sky Country, so it's finally springtime for sure. Here are a few projects the little one and I have been working on:
    That's a springy wreath my little one wanted to make for her room. We got the idea from Pinterest, naturally. See the tutorial here. We also made another wreath for the front door. No tutorial for this one, but it's similar to all those other yarn wreaths out there:

    I've also done some new pictures in oil paints. The first one turned out nicely, even though it didn't end up looking like the inspiration picture at all. The second painting is one for my dad, which I will give him for Father's Day. It's of the battlefield at Antietam National Park in Maryland. It looks much more like its inspiration photo.

    Yeah, the stone fence didn't work out at all. Happy accident!


    For Easter, the little one and I made bunnies. They were simple, inexpensive, and quick. Tutorial here.

    And last but not least is the veggie garden in process:
    They're just about ready for the garden!

    So that's it. Sorry for the long post, but it's been a while, and I wanted to show you what I've been up to. Have a great week, guys, and see you back here next time!

    Monday, March 24, 2014

    Ready for Spring

    March is nearly over here in big sky country, but spring has yet to get settled in. It seems like each time spring gets its foot in the door, winter comes over and stomps on it. We were blessed with mid-50 temps here a week ago, now it's below freezing. The same thing happened a few weeks ago. I'm honestly not sure what to make of it.

    In spite of all this, I have still started my seedlings indoors. I made a colorful yarn wreath, filled my bird feeders, painted a lovely picture of rolling hills covered with flowers, and baked sugar cookies in the shape of flowers. I'm trying to will spring to come, because I'm ready to be outside. My skin is dry and pasty white; it needs to feel the sun's warmth. I long for green in my garden. I'm very curious if the apple trees in my yard will be beautiful. I'm also looking forward to exploring my town when the weather is fine, when there's time to linger and enjoy discovering a new place, instead of hurrying in from the cold.

    Anyway, guys, I'm hoping to get some more pics up soon of what we're up to around here. Stay warm, friends, and repeat after me: winter won't be around forever.

    Wednesday, March 12, 2014

    Wanting to Do Something

    I have the desire to craft, and no idea what I want to do. I think to myself, "Maybe I'll paint a picture." However, that doesn't feel like what I want to do. I think, "How about a quilt?" Still, that doesn't seem like it. Refashion an outfit? Nah. Scrapbook? Uh-uh. Update my nightstands? No dice.

    What should I do, my friends? I have no idea, and I'm frustrated.

    Sigh.

    Monday, March 3, 2014

    Tumblr

    Guess what? I now have a tumblr blog! I'm going to be really cliche with it, posting pics and quotes that make me look worldly and witty, or at least that's the plan for now. Mainly it's going to be stuff that's positive and happy that I enjoy, which is why my description for it is, "My happy place on the web." So if you like cute animals, scenic photos, and clever quotes, be sure to check it out here: amccrescentmoon.tumblr.com

    Friday, February 28, 2014

    Ikea Envy and the Cost of Things

    So lately I've been having a bit of what I call "Ikea envy." It is a condition where, upon seeing the cool stuff you can do with Ikea products, you feel sad and a little jealous of people who are blessed to live near an Ikea. Have you seen all the fantastic "Ikea hacks" - the ones where people take a cheap piece of furniture, such as the RAST dresser ($34.99), and turn it into something that looks like a million bucks? Seriously, if you haven't seen them, take a minute and Google it. They're insanely clever, and right up my alley. Unfortunately for me, the closest Ikea is over eight hours away in Utah, and their shipping rates are exorbitant, so I'm stuck with a creative itch I can't scratch.

    At any rate, the whole reason I have this creative itch is because I've been bitten by the design bug. I guess it's just living in a new space that has me wanting a change, or it could be that I've had the same old stuff for years now and I would like something new. A lot of the things I have, while not bad, where either inexpensive things bought in a hurry, or they were hand-me-downs given to us to fill a specific need we had at the time. Combine that with the fact that quite a few of my possessions got pretty beat up in this last move, and I'm feeling the need for something different.

    That being said, I can't just go out and buy all new things because my husband and I are attempting to become debt-free in the next two or three years so we can begin saving for a down payment on the dream house we want to build. I have to make what I have last for now. However, it isn't just that. More and more I'm coming to realize that all those homes that I admire on Pinterest and in the magazines aren't furnished with particle board furniture from big box stores. The homes that dazzle me most are filled with family heirlooms, lucky flea market or yard sale finds, tirelessly sought for antiques and vintage pieces, and high-end quality stuff made by people who give a damn about their craft. That's what I want, and that kind of look takes time. If I try to rush it, I'm going to end up disappointed. So for now, I'm going to bide my time, and make due with what I have. So that means getting crafty.

    **WARNING: SMALL RANT AHEAD**

    I'm realizing lately that I am out of touch with how much things cost in general. The other day I hit up my local home improvement store for the things I need to spruce up my nightstands, and I suffered some serious sticker shock (say that five times fast) at the price of paint. It was the same at every store I checked. I also browsed my local craft store and did some internet searching for fabric, but by the time I was done, I was ready to cry. Who pays $99 a yard for fabric?! And I love me some Pottery Barn, but I think that $40-$60 might be a bit much for throw pillows. Now if you want the real kicker, Anthropologie has these nifty rough amethyst 4x6 inch picture frames for - wait for it - $548. A frame that holds a FOUR INCH BY SIX INCH picture. If you like these frames, I'm going to tell you a secret: buy the stuff you need to make this on Etsy, it will cost you about $30, maybe $40, depending on shipping. There. I just saved you $518. Seriously though, who is buying this stuff? It isn't me, or anyone I know. And listen, I know I'm a cheapskate, but I honestly DO NOT KNOW a single person who could afford to spend five hundred dollars on a tiny picture frame. The people I know have to do number crunching if they want to buy a decent sofa or a USED car, but that's the people I know, and granted, I don't know many. It just gets me how much things can cost, and what some places consider reasonable prices. Kind of like when Better Homes and Gardens does an article on small kitchens, and the kitchens they show are bigger than my living room. I've had a 10'x10' kitchen that also served as my dining room. It truly had only enough counter space to make a sandwich, yet I cooked meals and baked desserts for a family of three in it. Until BHG shows me a kitchen like that, I'm not inclined to give them much credibility. So when I see stuff advertised as affordable home decor, I bristle up a bit when they show things it would take my husband's whole paycheck to buy.

    Anyway, I'm done rambling for now. I appreciate you putting up with my musings. I promise less rant, more awesomeness for the next post. See ya!

    Monday, February 24, 2014

    Westward, Ho!

    So, I know I haven't talked much about it, but I thought I might share some photos from our journey westward to Big Sky Country. I didn't get a lot of photos because I was driving, but I got enough to sum up our journey.

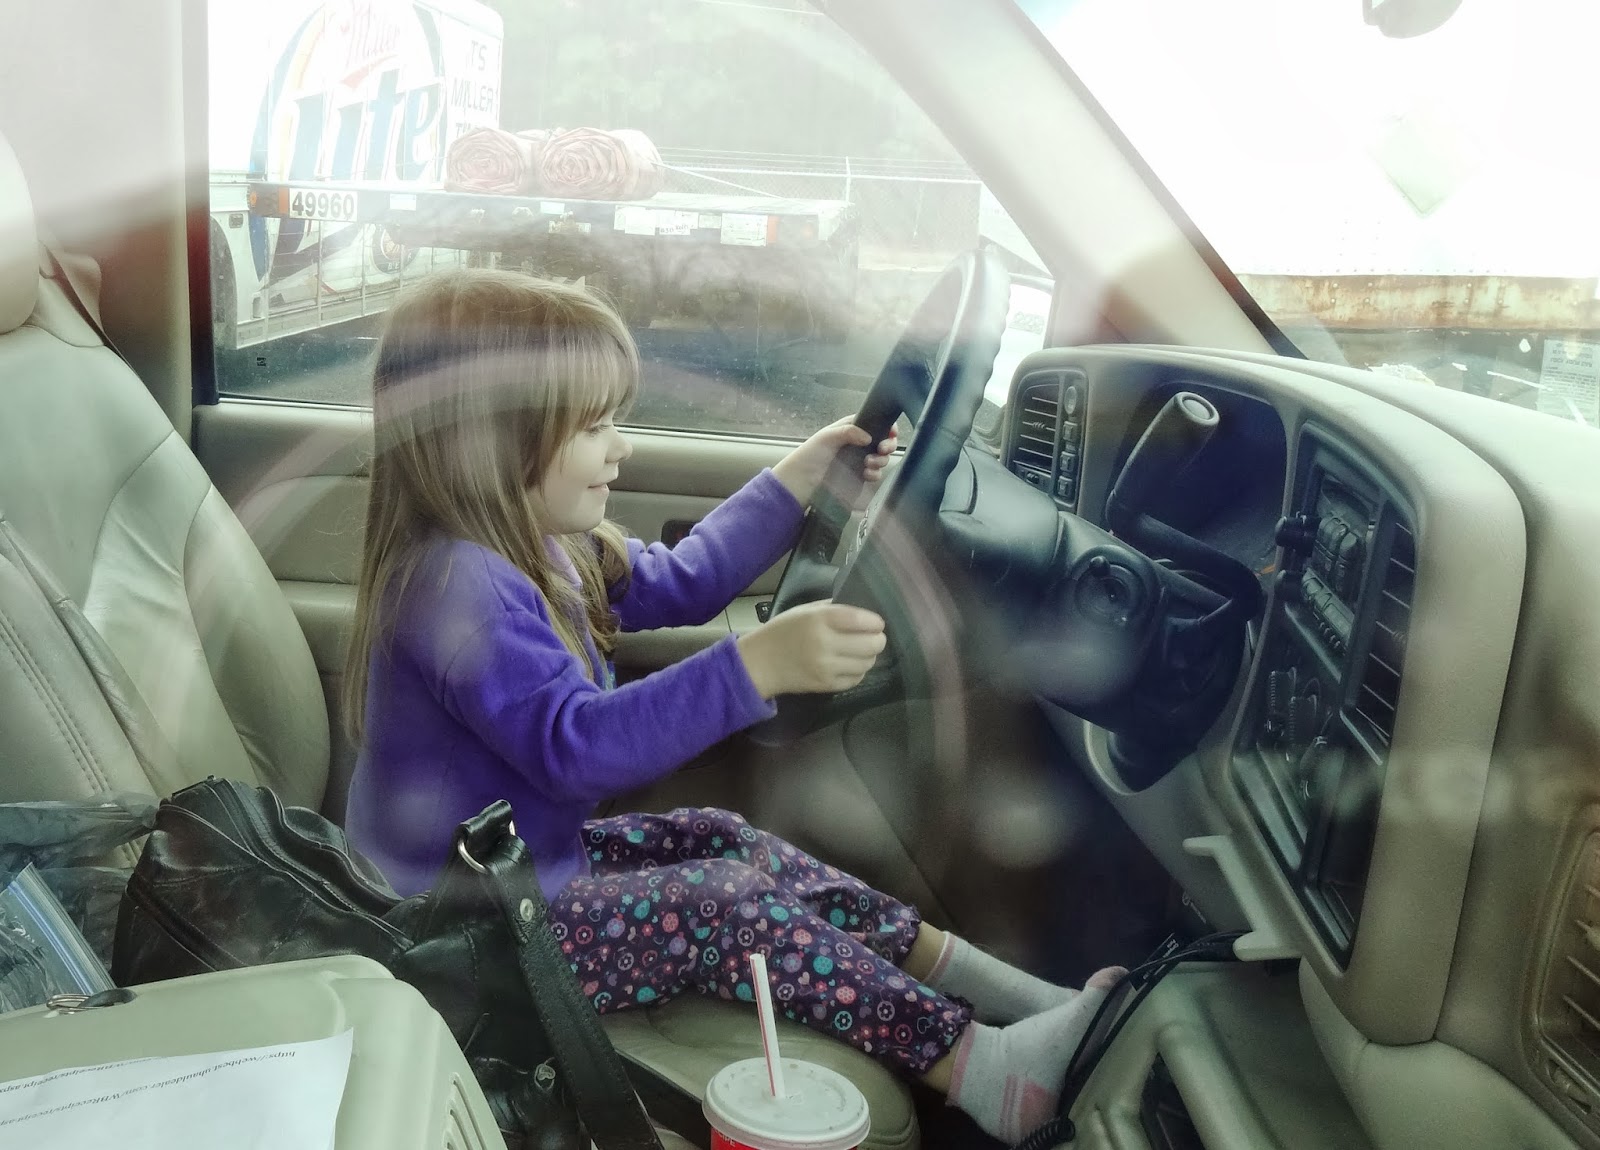
    This is my little one pretending to drive while we were stuck at the auto repair place in Augusta, GA. Word to the wise, rent something other than a U-haul. I won't go into detail, but suffice to say, after about 12 hours on day one, we'd only covered a distance that usually takes just two hours. Not a good way to start the trip. Fortunately, there weren't anymore problems once we got back on the road, but by then, I was already pretty frazzled.

    Day two began with us in Monteagle, TN. We woke up to LOTS of fog - like all the cliches about pea soup and hands in front of your face were completely true. While we waited for visibility to improve, we had a leisurely breakfast at the Rocky Top Restaurant. If you ever find yourself in Monteagle, you owe it to yourself to stop here. There's very good country cooking, friendly staff, and reasonable prices.


    More pics from day two: the Nashville skyline, farm life in Kentucky, my tuckered out crew (traveling with a five year-old, a dog, and a cat isn't easy), and the St. Louis arch. We covered as much ground as we possibly could on day two in an attempt to make up for lost time on day one. It was pretty hard, but I really wanted to get to Montana as close to on-schedule as possible. My husband had been in Billings for the last two months, and we'd missed our 10-year wedding anniversary, Halloween, my husband's birthday, Thanksgiving ,and our daughter's 5th birthday together. When my mother in-law offered to help me move out so we didn't miss Christmas together too, I was grateful, and I didn't want to wait any longer than I had to in order to finish the journey.

     When the St. Louis arch came into view, I was a happy camper. I'd been excited to see it since I found out we'd be passing by it on our trip. However, today, the "gateway to the west's" beauty signified something else: our day of driving was nearly done, and better yet, we were halfway to Montana. Twelve hours and four states later, we stopped on the west side of St. Louis and rewarded our monumental driving efforts with dinner at Steak' n Shake.

    Day three had us driving through a whole lotta nothin'. To the right is a pic of my little one at a rest stop in Iowa, getting a preview of the snow we had to look forward to. We had to trek the rest of the way across Missouri, into Iowa, and then across the vasty nothingness of South Dakota. To illustrate how little there is in South Dakota, my mom-in-law's husband, in spite of our warnings, decided to forego stopping for gas in Sioux Falls. When we began looking for gas, we finally found a little place several miles off the interstate. This town was so small, the gas station was also the town's grocery store and pizza joint!


    On day four, the final day of our journey, we started out about two hours from Rapid City, SD. Over to the right you can see that vasty nothingness I was talking about. Once we got to Rapid City, we took a detour to go see Mt. Rushmore, because coming so close and not seeing it seemed like a crime. After that, we had lunch in Sturgis, SD, where my mom-in-law picked up some souvenir t-shirts at the Harley Davidson shop for her nephew and his wife, who are avid bikers. From there, we made the final push across Wyoming, and I tell you, it was beautiful. The snow on the landscape looked like someone had dusted powdered sugar over a giant donut. There were mountains, antelope, bald eagles, and more deer that I've ever seen in my life! We even got to see Devil's Tower, which is fantastic, because it is literally the only thing around for miles. I'm telling you, if you ever have the opportunity to drive across Wyoming, DO IT! Just fill up on gas first, because if you don't, you might find yourself surveying the landscape on foot with a gas can in one hand.
     This picture doesn't do them justice, but here are some of the Bighorn Mountains (I think). And to think this scenery is practically in my backyard! Anyway, after stopping in Sheridan, WY, we got back on the road and finally arrived in Billings at about 8PM. WHEW! Even though I was sleeping on an air mattress because our stuff was still in the truck, I've never slept so hard in my life.

    So there you have it. Our four-day driving marathon across the ol' U.S. of A.